Karaage Chicken is crispy and succulent Japanese fried chicken. This delectable dish makes a great appetizer to share or main course. Simply marinate the chicken, fry, and serve!
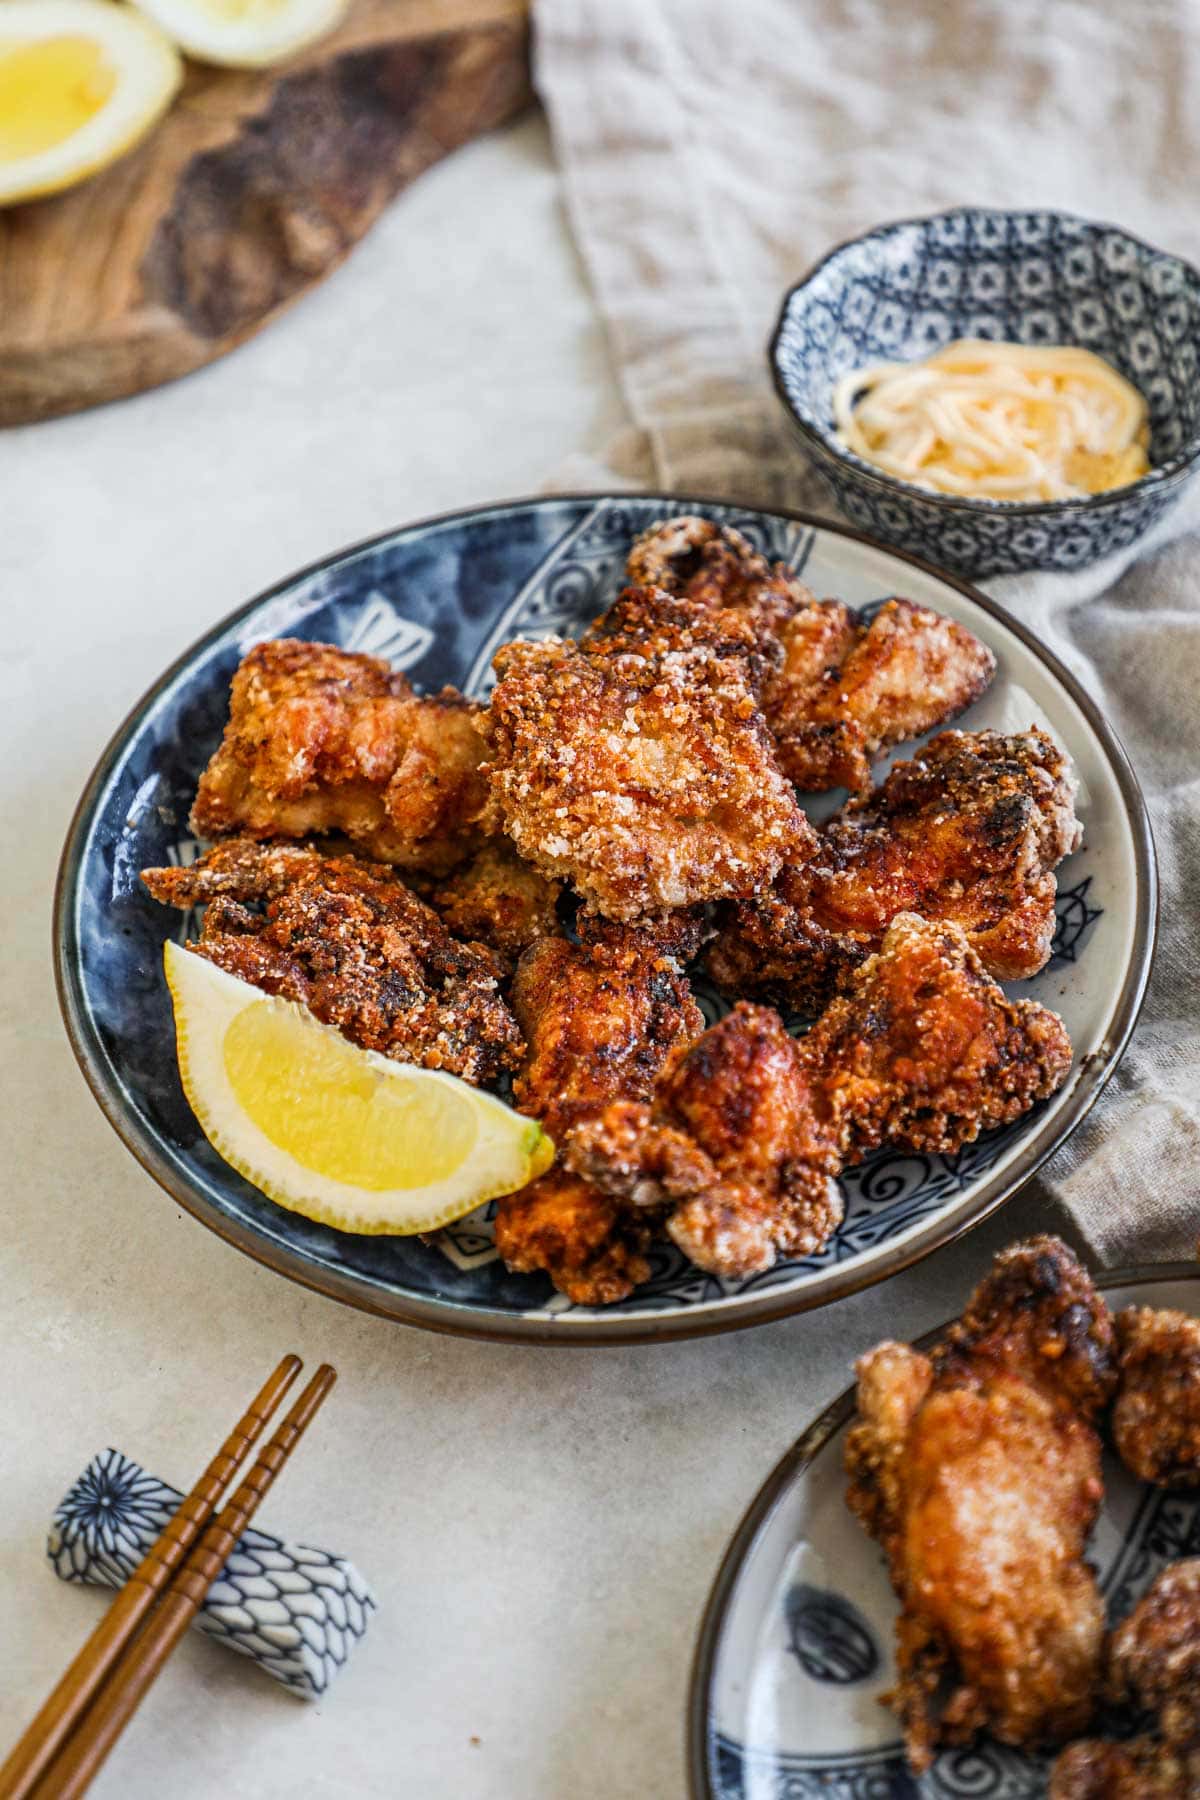
We love to order chicken karaage when we go out for Japanese food. It typically comes with lemon wedges and a Kewpie mayo dipping sauce. The combination of flavors is uniquely delicious, plus, it's gluten-free!
Now, we have perfected our own karaage recipe so you can enjoy it whenever you want! All it takes is a few simple steps to enjoy this restaurant quality dish at home. Try it in a donburi (rice bowl), bento box, or fried chicken sandwich.
Jump to:
What is Karaage Chicken?
Karaage is bite-sized fried chicken. Unlike other fried chicken, karaage is marinated in a tasty umami sauce before it is fried. The sauce gives the chicken a uniquely savory and lightly sweet flavor.
About Karaage Chicken
- Taste - This fried chicken recipe is rich and satisfying.
- Texture - The skin is perfectly crunchy and crispy and the inside is tender.
- Effort - All you need to do is marinate the chicken then fry it.
- Time - It takes about a half hour to prep and marinate the chicken. Then it takes about 15 minutes to fry it.
Ingredients

- Chicken - We love boneless, skin-on chicken thighs because they are flavorful and juicy. Ask your butcher to remove the bone from the thighs for easy preparation.
- Corn starch - Corn starch provides a light and crispy coating to the chicken.
- Oil for deep frying - For frying use an oil with a high smoke point like grape seed oil, avocado oil, canola oil.
- Soy sauce - Soy sauce, or shoyu in Japanese, is an essential condiment in Japanese cooking that adds a rich umami flavor to the marinade.
- Mirin - Mirin is a sweet rice wine that is the base of this marinade.
- Ginger - Grated fresh ginger adds a light yet pungent spice.
- Garlic - Minced garlic adds the quintessential aroma to the marinade.
See recipe card for quantities.
Substitutions and Variations
- Potato starch - You can also use potato starch instead of corn starch for dredging.
- Spice - Add some freshly cracked black pepper or togarashi to the chicken for a light spice.
- Hot Honey - Drizzle some hot honey to make the chicken extra hot and spicy.
- Tonkatsu sauce - Tonkatsu sauce adds a tangy, sweet, and savory flavor.
- Sliders - Enjoy this karaage chicken in fried chicken sliders with spicy kewpie mayo and asian slaw.
Instructions

- Prepare chicken - In a large bowl, whisk sake, soy sauce, mirin, grated ginger, and grated garlic. Cut chicken diagonally into big bite-sized pieces, dry with a paper towel, and place in the bowl. Use tongs to toss the chicken so it is thoroughly coated with the marinade. Then let the chicken absorb the juices in the refrigerator for at least 30 min. (Photo 1, 2, and 3)
- Coat chicken - Drain and pat the chicken dry with a paper towel. Coat the chicken thoroughly with corn or potato starch. (Photo 4)

- Cook chicken - fry in oil at 340-360°F until golden and the internal temperature reaches 165°F in the thickest part, about 2-3 minutes on both sides. Fry in batches so as to not overcrowd the pan. (Photo 5 and 6)
- Rest and serve - Remove from oil with a slotted spoon and transfer to a paper towel-lined plate to absorb the excess oil. Then enjoy with lemon wedges and Kewpie mayo for dipping. (Photo 7 and 8)
Pro tip - To ensure the corn starch sticks sticks to the chicken, dab the chicken with a paper towel to remove excess moisture before dredging the chicken.
How to Eat Karaage Chicken
Karaage chicken can be enjoyed as an appetizer or main course. We often eat it for weeknight dinner with rice, lemon wedges, and a dipping sauce like Kewpie mayo or Spicy Mayo, and a Japanese side. Our favorite sides for karaage include Furikake and Lemon Shishito Peppers, Miso Glazed Japanese Eggplant, and Spicy Kani Salad. You can also enjoy karaage chicken with classic fried chicken sides.
Storage
Store leftover karaage chicken in an air-tight container in the refrigerator for up to 3 days. In order to reheat the chicken, heat the oven to 350ºF and place the pieces of kaarage on a baking sheet. Bake in the oven for 5-10 minutes or until hot.
Cooking Tips
- Make sure every part of the chicken is covered with corn starch. This increases the chicken's surface area and makes the chicken extra crispy.
- Make sure the oil is hot enough before adding the chicken. The oil should be around 350°F. If you don't have a thermometer, test the oil by putting the end of a wooden spoon or chopstick in the oil. If it starts to bubble, it is ready.
- Don't overcrowd the skillet so you have enough room to flip over the chicken while it's cooking. Overcrowding the skillet can also lower the heat of the oil.
- Use a fish spatula or tongs so it is easy to pick up the chicken in the oil.
- Rest the cooked chicken paper on a towel lined plate to soak up excess oil. Leave space between the chicken pieces so they don't get soggy.
- Remove any burnt bits between frying batches of chicken.
Recipes FAQs
First, karaage chicken is marinated before frying unlike other fried chicken. It is also coated in a layer of potato starch or corn starch while other fried chicken uses flour or beer batter.
We typically use boneless, skin-on chicken thighs because it is the most tender and flavorful.
We love this fried chicken recipe with Kewpie mayo, Spicy Mayo, or tonkatsu sauce, a uniquely delicious Japanese sauce.
This can happen if the oil is not hot enough. Make sure your oil is at least 340°F before adding the chicken.
In order to keep the karaage crispy, reheat it in the oven at 350ºF until warm.

Related Recipes
Did You Like This Recipe?
Love this easy karaage chicken recipe? Please leave a 5-star rating in the recipe card below and check out our other easy Japanese recipes. Thanks!
Sign up for THP's newsletter and keep in touch on Instagram, Facebook, Pinterest, TikTok, and YouTube. If you make this chicken karaage recipe, tag #theheirloompantry so we can see your homemade karaage chicken!
📖 Recipe
Karaage Chicken (Japanese Fried Chicken)
Equipment
Ingredients
Instructions
- Prepare chicken - In a large bowl, whisk sake, soy sauce, mirin, grated ginger, and grated garlic. Cut chicken diagonally into big bite-sized pieces, dry with a paper towel, and place in the bowl. Use tongs to toss the chicken so it is thoroughly coated with the marinade. Let the chicken absorb the juices in the refrigerator for at least 30 min.2 tablespoon Japanese cooking sake, 1 tablespoon soy sauce, 1 tablespoon mirin, 1 inch knob of grated ginger, 2 cloves garlic, 2 lbs chicken thighs
- Coat and cook chicken - Drain and pat the chicken dry with a paper towel. Coat the chicken thoroughly with corn starch and fry in oil at 340-360°F until golden and the internal temperature reaches 165°F in the thickest part, about 2-3 minutes on both sides. Fry in batches so as to not overcrowd the pan. Remove from oil with a slotted spoon and transfer to a paper towel-lined plate to absorb the excess oil. Enjoy with lemon wedges.1 cup corn starch, oil for frying, lemon wedges
Video
Notes
- Refrigerate leftover karaage chicken in an air-tight container for up to 3 days. In order to reheat the chicken, heat the oven to 350ºF and place the pieces of kaarage on a baking sheet. Bake in the oven for 5-10 minutes or until hot.
- Dab the chicken with a paper towel to remove excess moisture before dredging the chicken to ensure the corn starch sticks to the chicken.
- Make sure every part of the chicken is covered with corn starch. This increases the chicken's surface area sand makes the chicken extra crispy.
- Make sure the oil is hot enough before adding the chicken. The oil should be around 350°F. If you don't have a thermometer, test the oil by putting the end of a wooden spoon or chopstick in the oil. If it starts to bubble, it is ready.
- Don't overcrowd the skillet. Overcrowding the skillet can also lower the heat of the oil.
- Use a fish spatula or tongs so it is easy to pick up the chicken from the oil.
- Rest the cooked chicken on a paper towel lined plate to soak up excess oil. Leave space between the chicken pieces so they don't get soggy.
- Remove any burnt bits between frying batches of chicken.



Leave a Reply