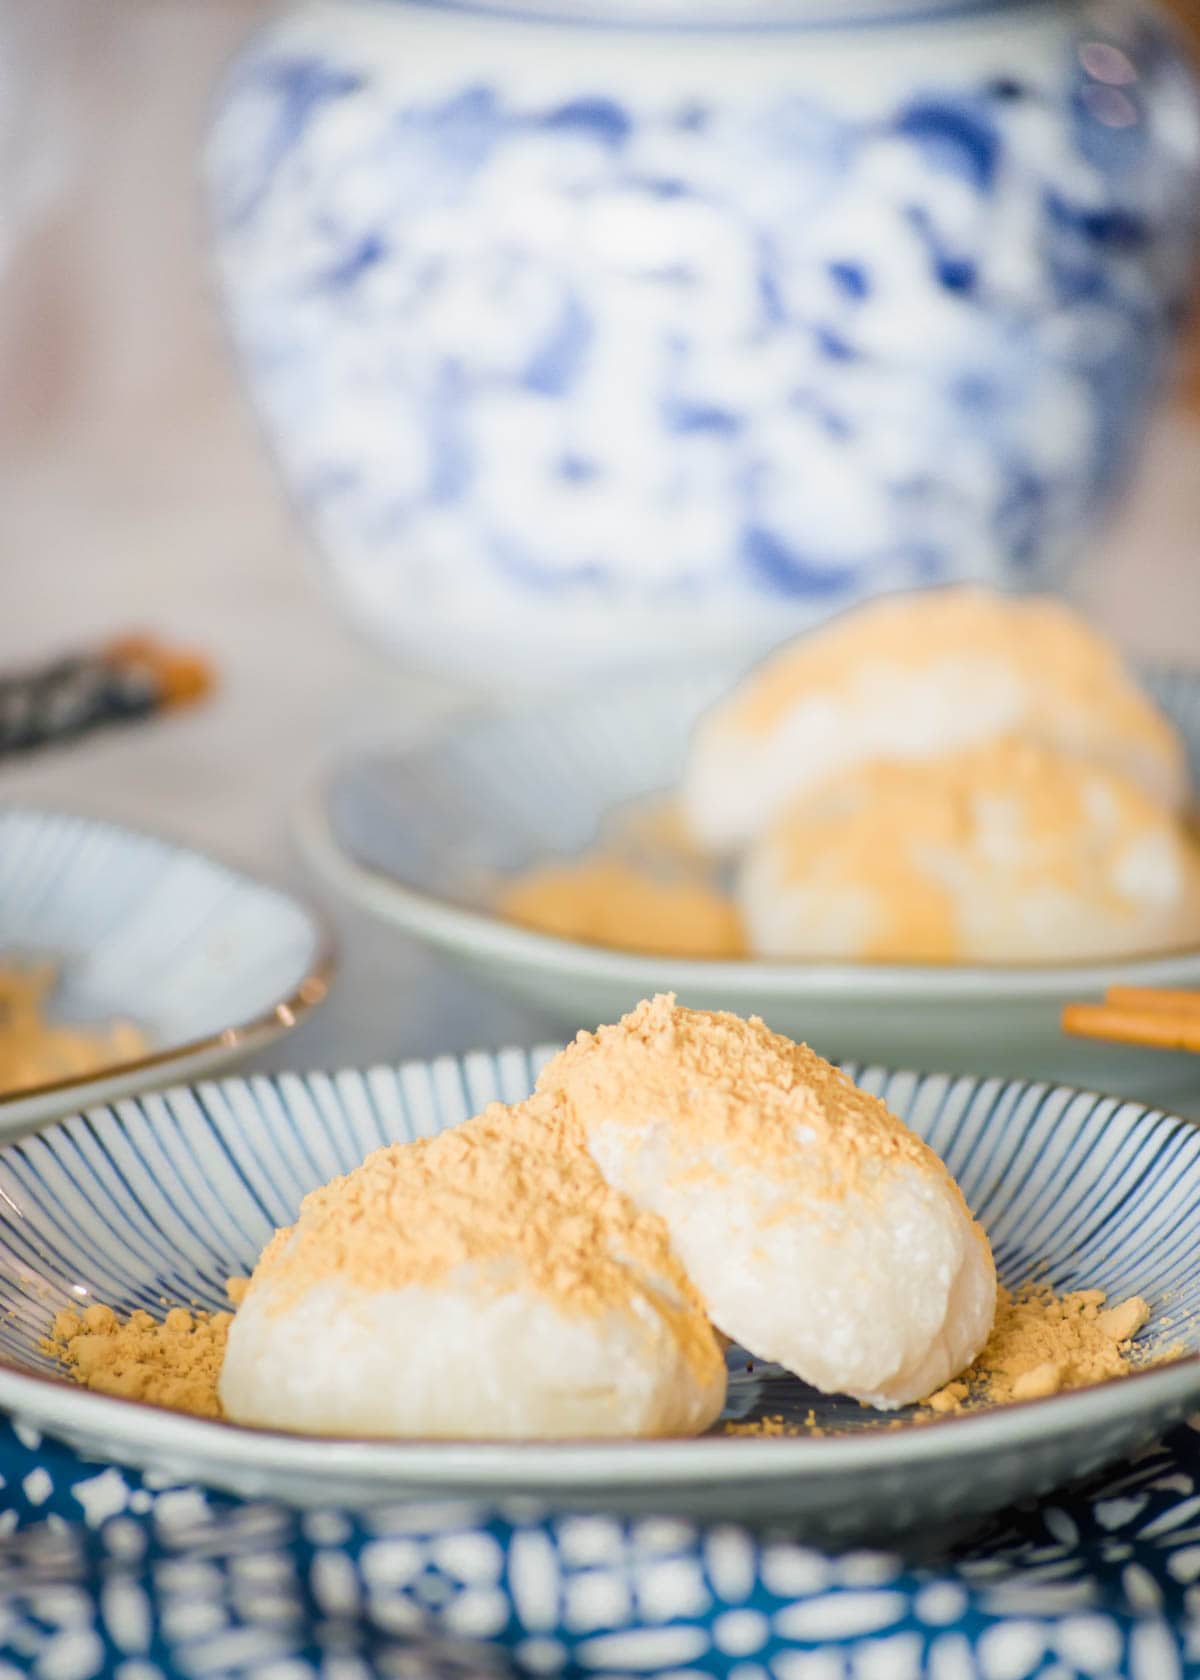
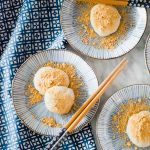
Kinako Mochi is a traditional Japanese sweet made of sweet rice flour mochi and dusted with kinako powder, a roasted soybean powder. This sweet dessert is traditionally enjoyed on New Years Day to bring good luck.

Sometimes the simplest recipes are the most delicious. While I love spending Saturday baking cakes and cookies, I sometimes want a quick and easy dessert with minimal cleanup. When I have a sweet tooth, I make a quick batch of mochi. This mochi recipe is a fun and easy introduction to Japanese sweet treats!
When I was a kid, my dad would make my brother & me mochi as a treat while we watched our Saturday morning cartoons. It is a perfect snack since these fluffy rice clouds can be eaten in just a couple of bites and can be made in under 30 minutes.
Jump to:
Mochi is light and sweet, and you can eat a few of them without feeling too full or overloaded on sugar. If you're gluten free and want a sweet snack, mochi is a great alternative to traditional flour-based desserts. Since it has a rice flour base, it is naturally gluten free. I especially love to dust mochi with kinako, a toasted soybean flour that adds a wonderfully nutty, warm flavor. You can purchase kinako here on Amazon.
Ingredients
- Mochiko Sweet Rice Flour - Glutinous rice flour that provides structure for the mochi.
- Sugar - Provides the sweetness to the mochi.
- Kinako flour - Adds a rich nutty flavor to the mochi.
- Corn starch or potato starch for dusting - Keeps the mochi from sticking to each other.
How to Make Kinako Mochi
You can make mochi in either a microwave or on the stovetop. Here are the instructions for both:
Microwave Instructions
- Whisk flour and sugar - In a large microwave-safe mixing bowl, whisk flour and sugar.
- Add water and mix - Add water and mix with a spatula until smooth.
- Microwave and fold - Microwave for 3 minutes at 600 watts. Remove mochi mixture from the microwave and mix with a silicone spatula or rice paddle. Microwave for an additional 3 minutes. Remove from microwave and knead the mochi with a silicone spatula or rice paddle in the bowl until smooth. The dough will be pliable and sticky.
Stovetop Instructions
- Whisk flour and sugar - In a large mixing bowl, whisk flour and sugar.
- Add water and mix - Add water and mix with a spatula until smooth.
- Cook and stir in a saucepan - In a saucepan over low-medium heat, add the mochi mixture and stir constantly using a wooden spoon or heatproof baking spatula. After 7-10 minutes, the mochi mixture will thicken and turn into a smooth and shiny mixture. Remove from heat.
Mochi Assembly Instructions
- Allow mochi to cool - Transfer the cooked mochi mixture into a mixing bowl and allow the mochi to cool for 5-10 minutes.
- Roll into mochi balls - Dust a pastry board or clean countertop space with the starch and cover your hands with starch. Peel off a piece of mochi about the size of a golf ball and roll it in your hands until it is a smooth, round ball.
- Flatten mochi balls - Gently flatten the ball and place it on the starch-covered countertop. Continue this process until all the dough is used up.
- Toast mochi in a skillet - Once you have rolled all the dough into small mochi cakes, heat a non-stick skillet on medium heat. Place a few mochi on the skillet and toast about 2 minutes on each side.
- Plate and dush with kinako powder - Plate the mochi and lightly dust with kinako powder. Serve immediately.

Substitutions
- Shiratamako Flour - Shiratamako flour is another glutinous rice flour you can use to replace Mochiko flour. It has a more refined flavor and is easier to manipulate then Mochiko flour, but is twice as expensive.
Variations
- Chocolate Mochi - To make this mochi chocolatey, add cocoa powder to the Mochiko flour before you add in the wet ingredients.
- Strawberry Mochi - Pulse dehydrated strawberries in a blender or food processor to make strawberry powder. Then whisk strawberry powder into Mochiko flour before adding wet ingredients.
- Daifuku Mochi - Daifuku is a red bean paste made from azuki beans. It is a delicious variation on classic Mochi.
- Mochi Waffle - A delicious modern take on traditional Mochi.
Equipment
This rice cake recipe calls for a few common kitchen essentials, including a measuring cup, a mixing bowl, whisk, silicone baking spatula, and a skillet or non-stick pan. Use these popular kitchen essentials in other recipes too.
Storage
Best enjoyed fresh, but you can store these rice cakes in an air-tight container for up to 3 days. Do not store Mochi in the refrigerator because it will become hard and dry out.
Top Tip
Kinako Mochi is a great treat to give out to neighbors and friends during the holidays. In order to give them as a gift, place them in an air-tight container and place each mochi into an individual cupcake wrapper (so they don't stick together).
📖 Recipe
Kinako Mochi
Ingredients
- 1 cup Mochiko Sweet Rice Flour
- ¼ cup sugar
- 1 cup water
- 1 cup kinako flour
- potato starch or corn starch for dusting
Instructions
Microwave Mochi Instructions
- In a large microwave-safe mixing bowl, whisk flour and sugar. Add water and mix with a silicone spatula until smooth. Microwave for 3 minutes at 600 watts. Remove mochi mixture from the microwave and mix with a silicone spatula or rice paddle. Microwave for an additional 3 minutes. Remove from microwave and knead the mochi with a silicone spatula or rice paddle in the bowl until smooth. The dough will be pliable and sticky.
Stovetop Mochi Instructions
- In a large mixing bowl, whisk flour and sugar. Add water and mix with a spatula until smooth. In a saucepan over low-medium heat, add the mochi mixture and stir constantly using a wooden spoon or heatproof baking spatula. After 7-10 minutes, the mochi mixture will thicken and turn into a smooth and shiny mixture. Remove from heat.
Kinako Mochi Instructions
- Roll mochi into balls - Transfer the cooked mochi mixture into a mixing bowl and allow the mochi to cool for 5-10 minutes. Dust a pastry board or clean countertop space with the starch and cover your hands with starch. Peel off a piece of mochi about the size of a golf ball and roll it in your hands until it is a smooth, round ball. Gently flatten the ball and place it on the starch-covered countertop. Continue this process until all the dough it used up.
- Pan fry mochi cakes (optional) - Once you have rolled all the dough into small mochi cakes, heat a non-stick skillet on medium heat. Place a few mochi on the skillet and toast about 2 minutes on each side until golden and toasted. This step is optional but adds a nice texture.
- Plate and serve - Plate the mochi and lightly dust with kinako powder. Serve immediately.

Michelle
My mom used to make these when we were kids, had a taste for some and used this recipe…delicious!
Kathleen Higashiyama
Hi Michelle, I'm glad you enjoyed the recipe! My dad used to make it for me as a kid too and the flavor of kinako makes me very nostalgic. If you like chocolate, we recommend this Chocolate Truffle Mochi recipe. Have a great day!
David
Never made mochi before, but this was great!
Kelly
So easy to make and yummy!