No-Bake Mini Cheesecakes are the perfect bite-sized delights! They feature a decadent cream cheese filling on a delicate graham cracker crust topped with fresh sliced fruit or your favorite toppings. Try them for your next party — you won't be disappointed!
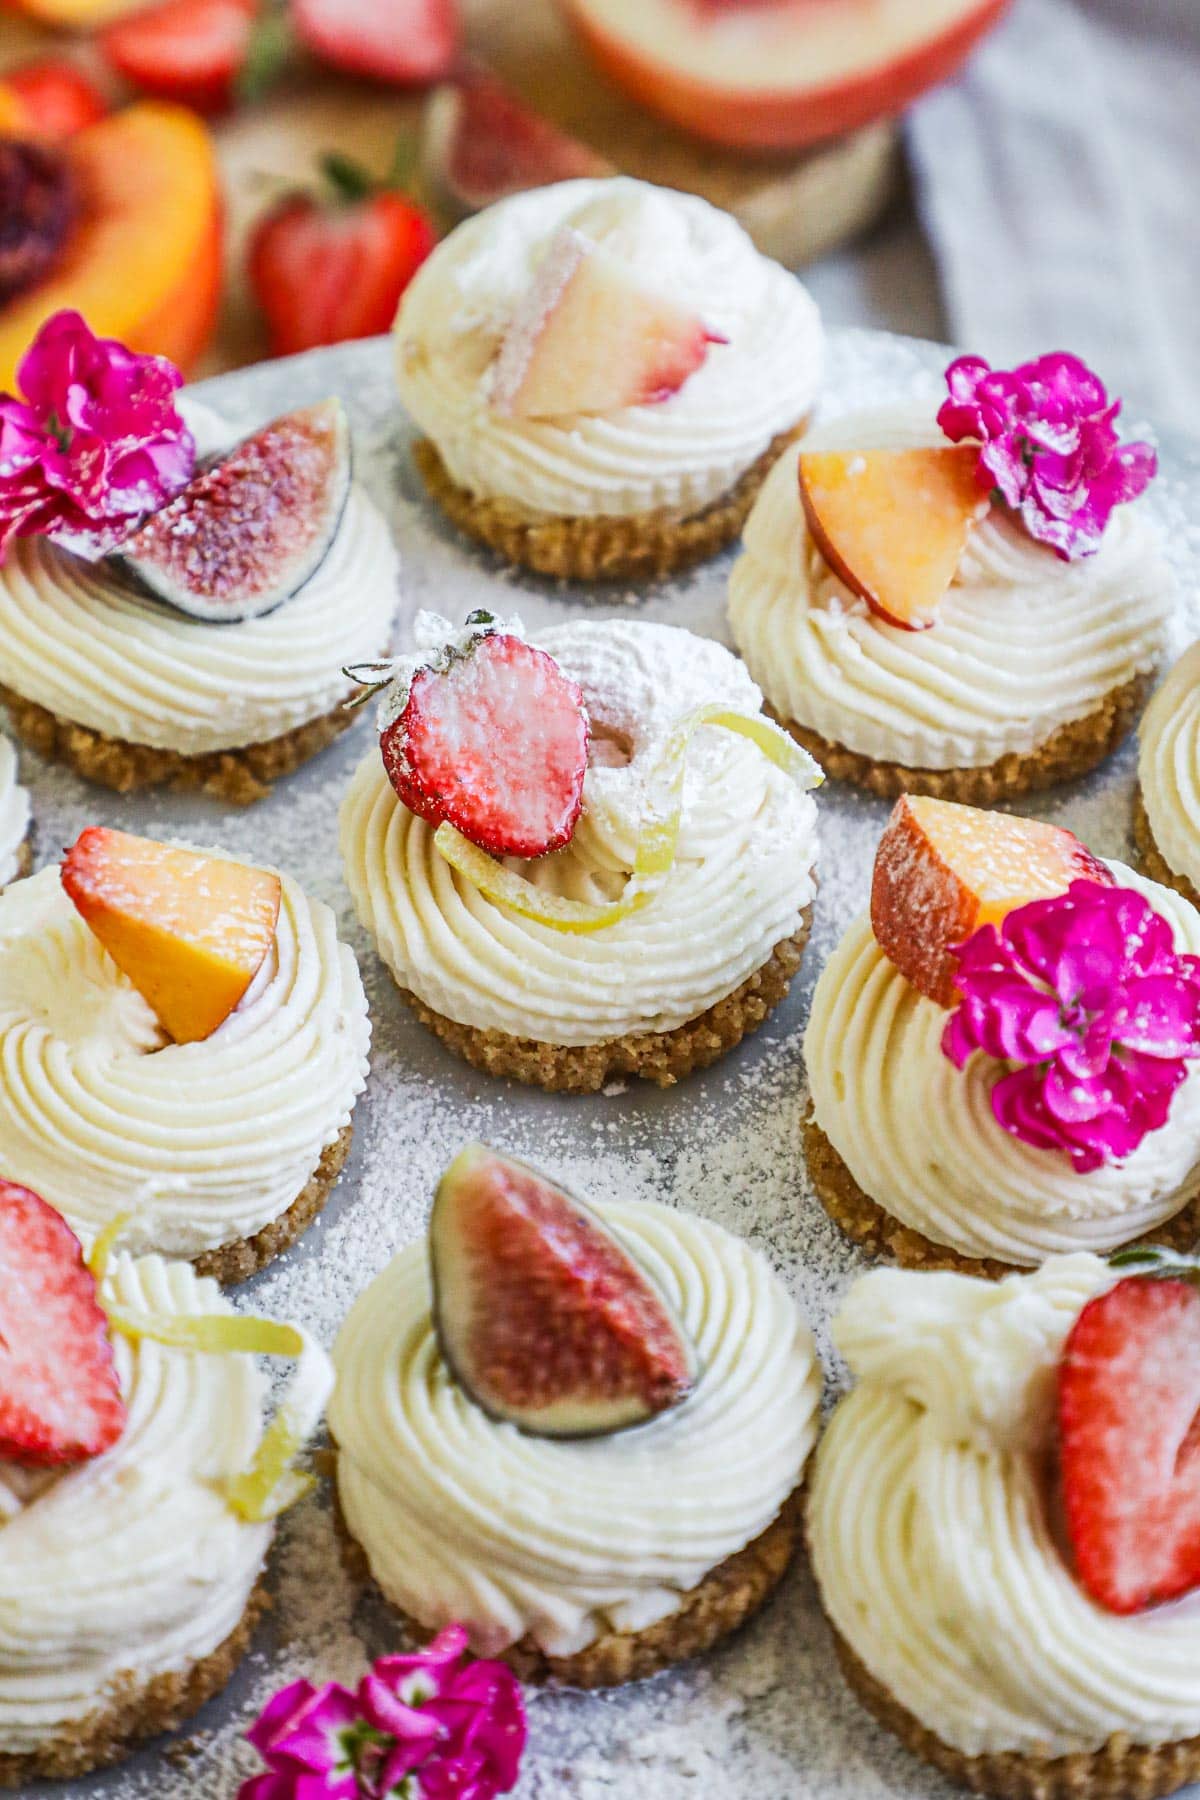
We love to make a batch of these for get-togethers with family and friends. They are the perfect size for a tasty dessert without being overfilling. Experiment with different fruit toppings like fresh strawberries, figs, peaches, or strawberry compote.
Looking for an easy full sized cheesecake recipe? Try our 3-Ingredient No Bake Cheesecake!
Jump to:
About No Bake Mini Cheesecakes
- Taste - These mini cheesecakes are rich and perfectly sweet.
- Texture - The filling is thick and creamy and the crust is crispy.
- Effort - This recipe is surprisingly easy. You just need to make the crust, make the filling, then assemble the cakes and chill them.
- Time - It takes about 20 minutes to prep the crust and mini cheesecakes. Then about 4 hours to chill the cheesecakes.
Ingredients
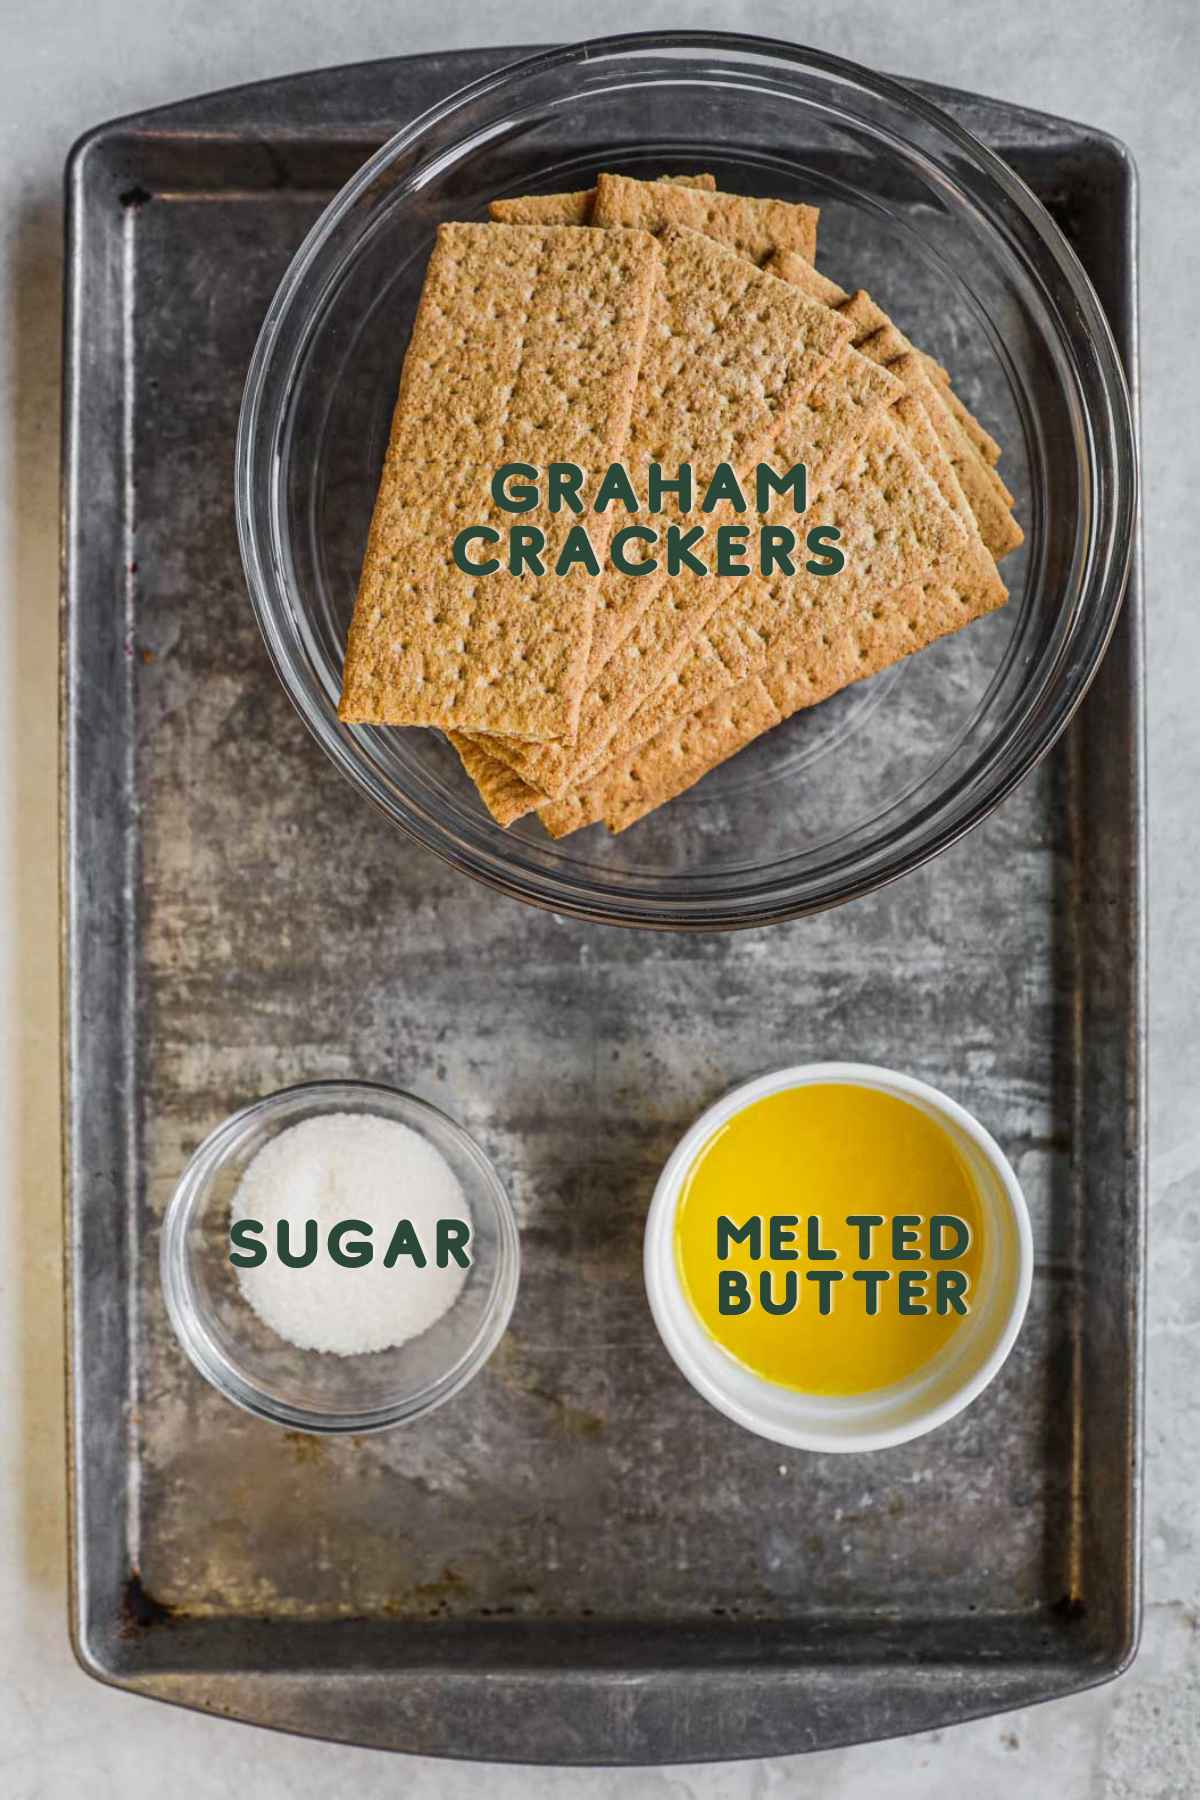
Graham Cracker Crust
- Graham cracker or graham cracker crumbs - Graham crackers are the base of the crust.
- Granulated sugar - Sugar provides sweetness.
- Butter or dairy-free butter - Butter holds the graham cracker mixture together and adds richness.
Filling
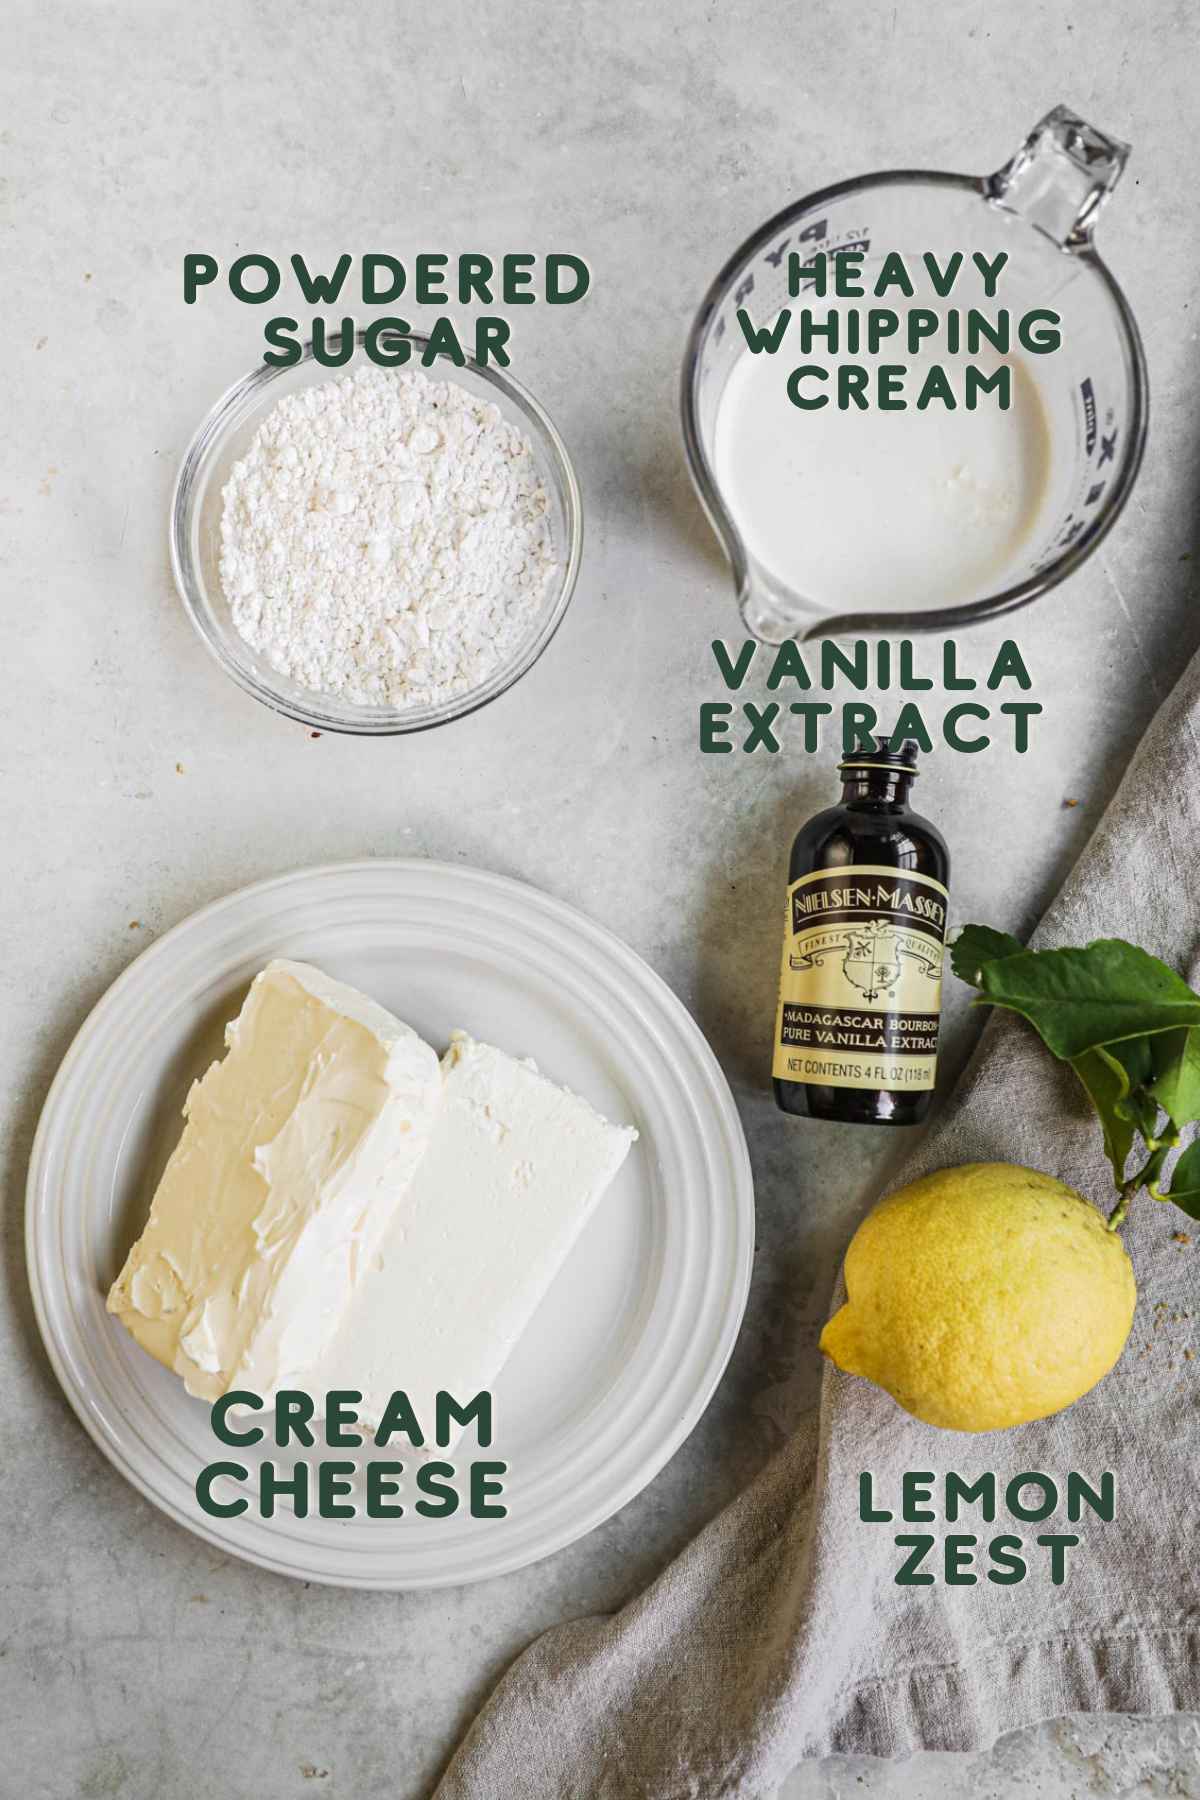
- Full-fat cream cheese - Cream cheese provides the creamy structure of the cheesecake.
- Powdered sugar - Powdered sugar adds sweetness to the filling.
- Vanilla extract or vanilla bean paste - Vanilla enhances the other flavors in the recipe.
- Lemon zest - Lemon zest adds brightness.
- Heavy whipping cream - Heavy whipping cream makes the cheesecake fluffy and creamy.
- Sliced fruit or compote - Add fresh sliced fruit like strawberries, figs, peaches or compote for a nice topping.
See recipe card for quantities.
Substitutions and Variations
- Pumpkin cheesecake - Add pumpkin puree and pumpkin pie spice to the filling for a fall and holiday treat.
- Chocolate - Add a swirl of Nutella or cocoa powder to the cream cheese for a touch of chocolate flavor.
- Gluten-free graham cracker crust - Use a gluten-free graham cracker crust to make this recipe gluten-free.
- Whipped Cream - Add whipped cream for extra sweetness. Try our Homemade Whipped Cream for an easy and delicious recipe.
Instructions
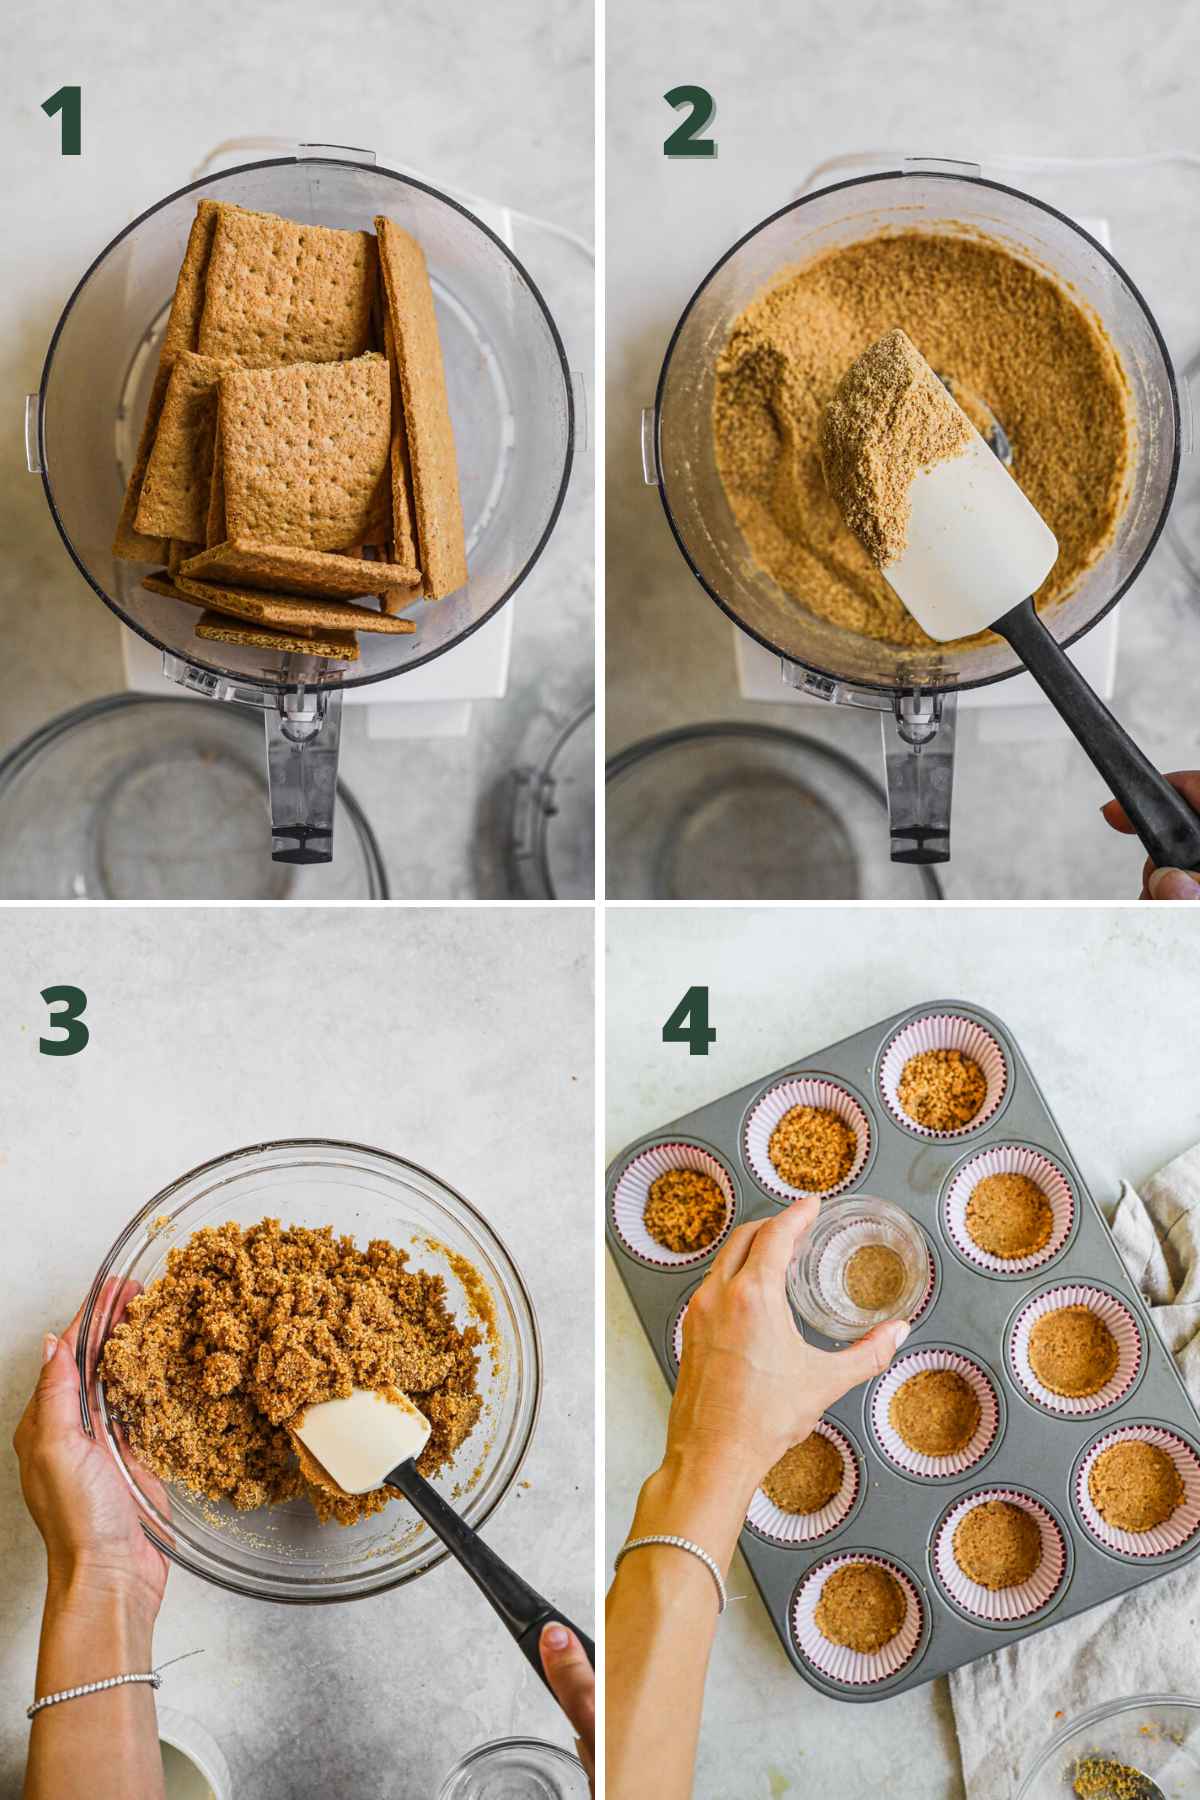
- Prepare crust - Line a muffin pan with cupcake liners and set aside. Add graham crackers to a food processor and pulse until it forms a sandy texture. Then transfer to a mixing bowl and add sugar and melted butter. Stir the mixture with a silicone spatula or a fork until the crumbs are coated and moist. (Photo 1, 2, and 3)
- Distribute crumbs - Then, evenly distribute into cupcake liners and use your fingertips or a small glass (like a shot glass) to press the crumbs to make an even layer on the bottom of the liners. Chill while you make the filling. (Photo 4)
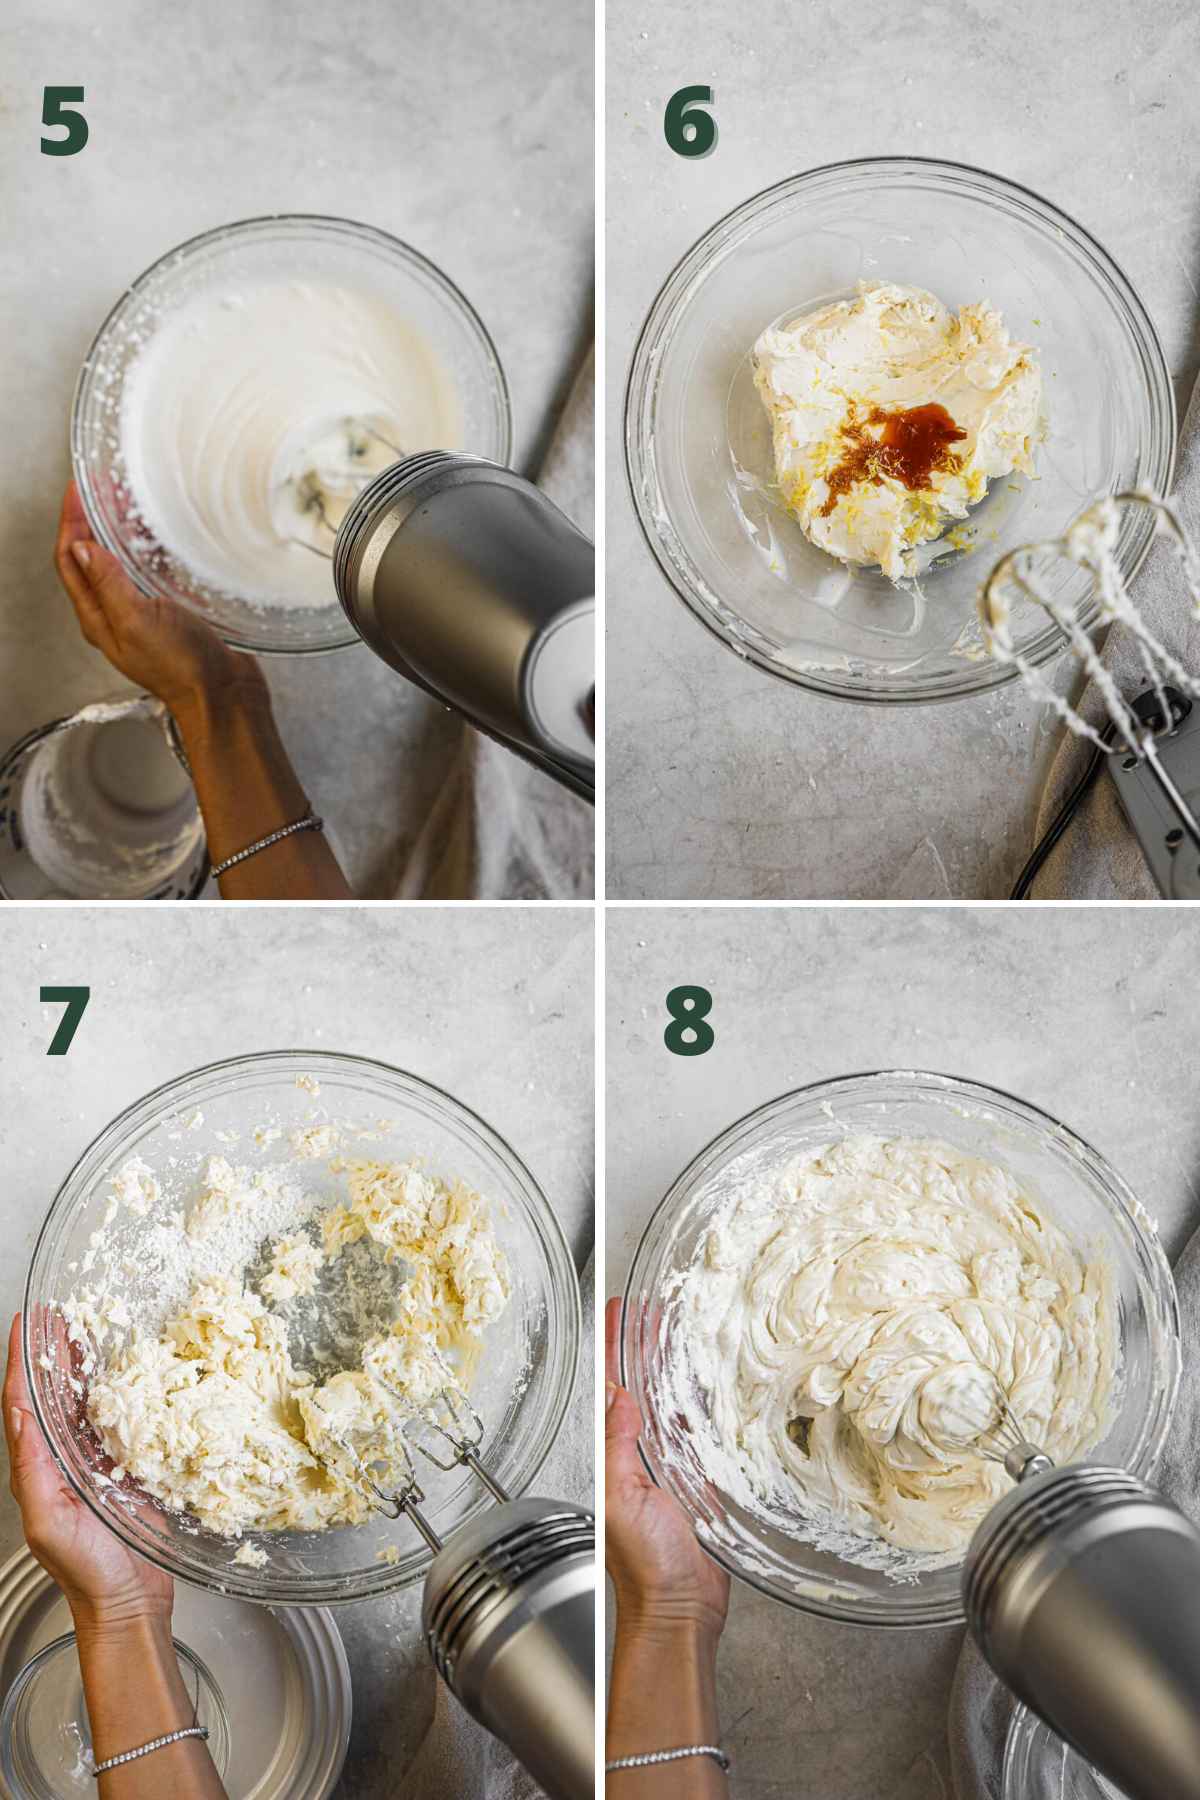
- Make whipped cream - Place the heavy whipping cream in the bowl and whisk by hand or use an electric mixer until stiff peaks form, about 4-5 minutes. Make sure you do not over mix or the cream will curdle. Set aside. (Photo 5)
- Make whipped cream cheese - In a separate mixing bowl, use a handheld mixer or stand mixer and whisk cream cheese and powdered sugar on medium until fluffy, about 3 minutes. Then, whisk in mix-ins of choice, if desired. (Photo 6 and 7)
- Combine the filling ingredients - Then gently fold the whipped cream into the cream cheese mixture with a silicone spatula or with a mixer on the lowest setting just until incorporated and creamy. Do not over mix or the mixture will deflate. (Photo 8)
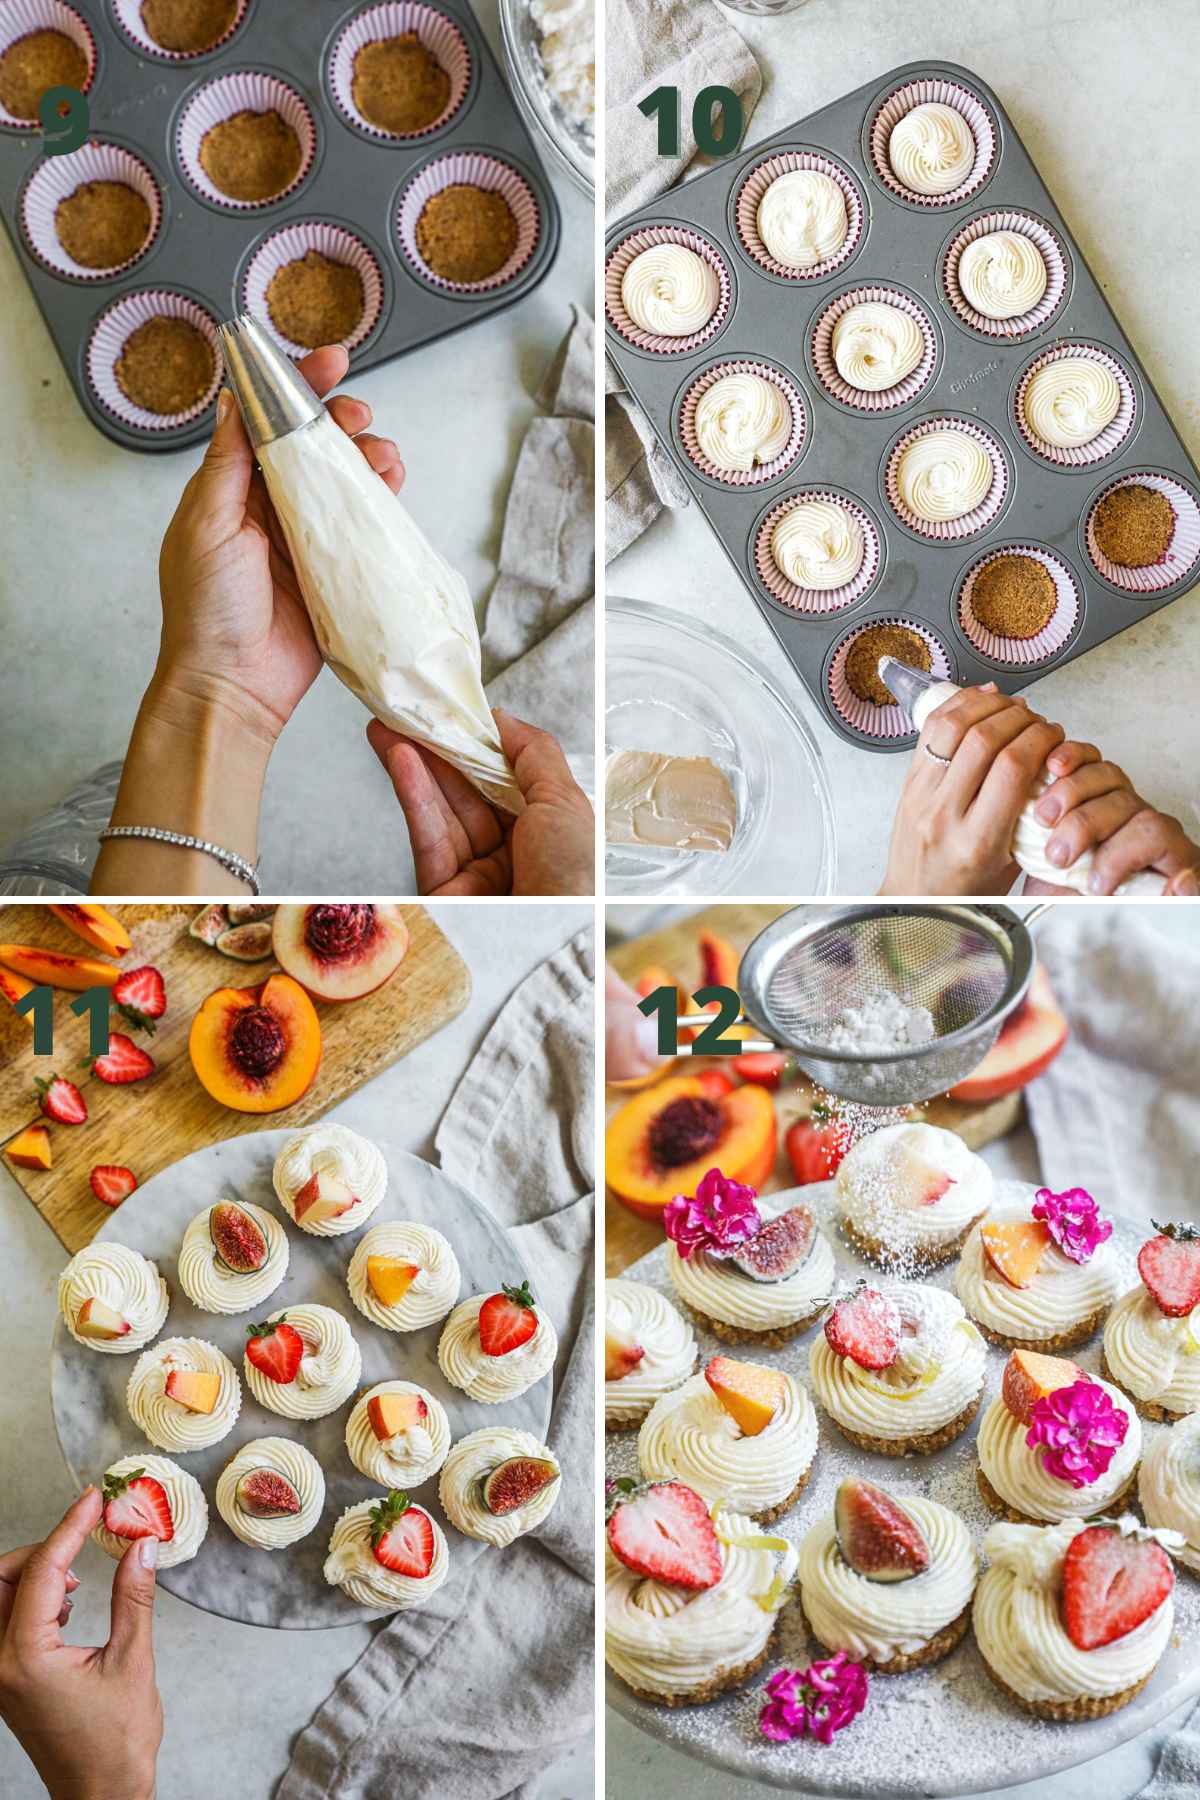
- Assemble and chill - Once you are done mixing, use a silicone spatula to scrape the bottom and sides of the bowl to ensure all ingredients are incorporated. Then transfer to a piping bag and pipe into each cupcake liner on top of the graham cracker crust. Alternatively, scoop and evenly distribute to each cupcake liner and use the back of a spoon to smooth out the filling. Transfer to the refrigerator and chill for at least 4 hours or overnight. (Photo 9 and 10)
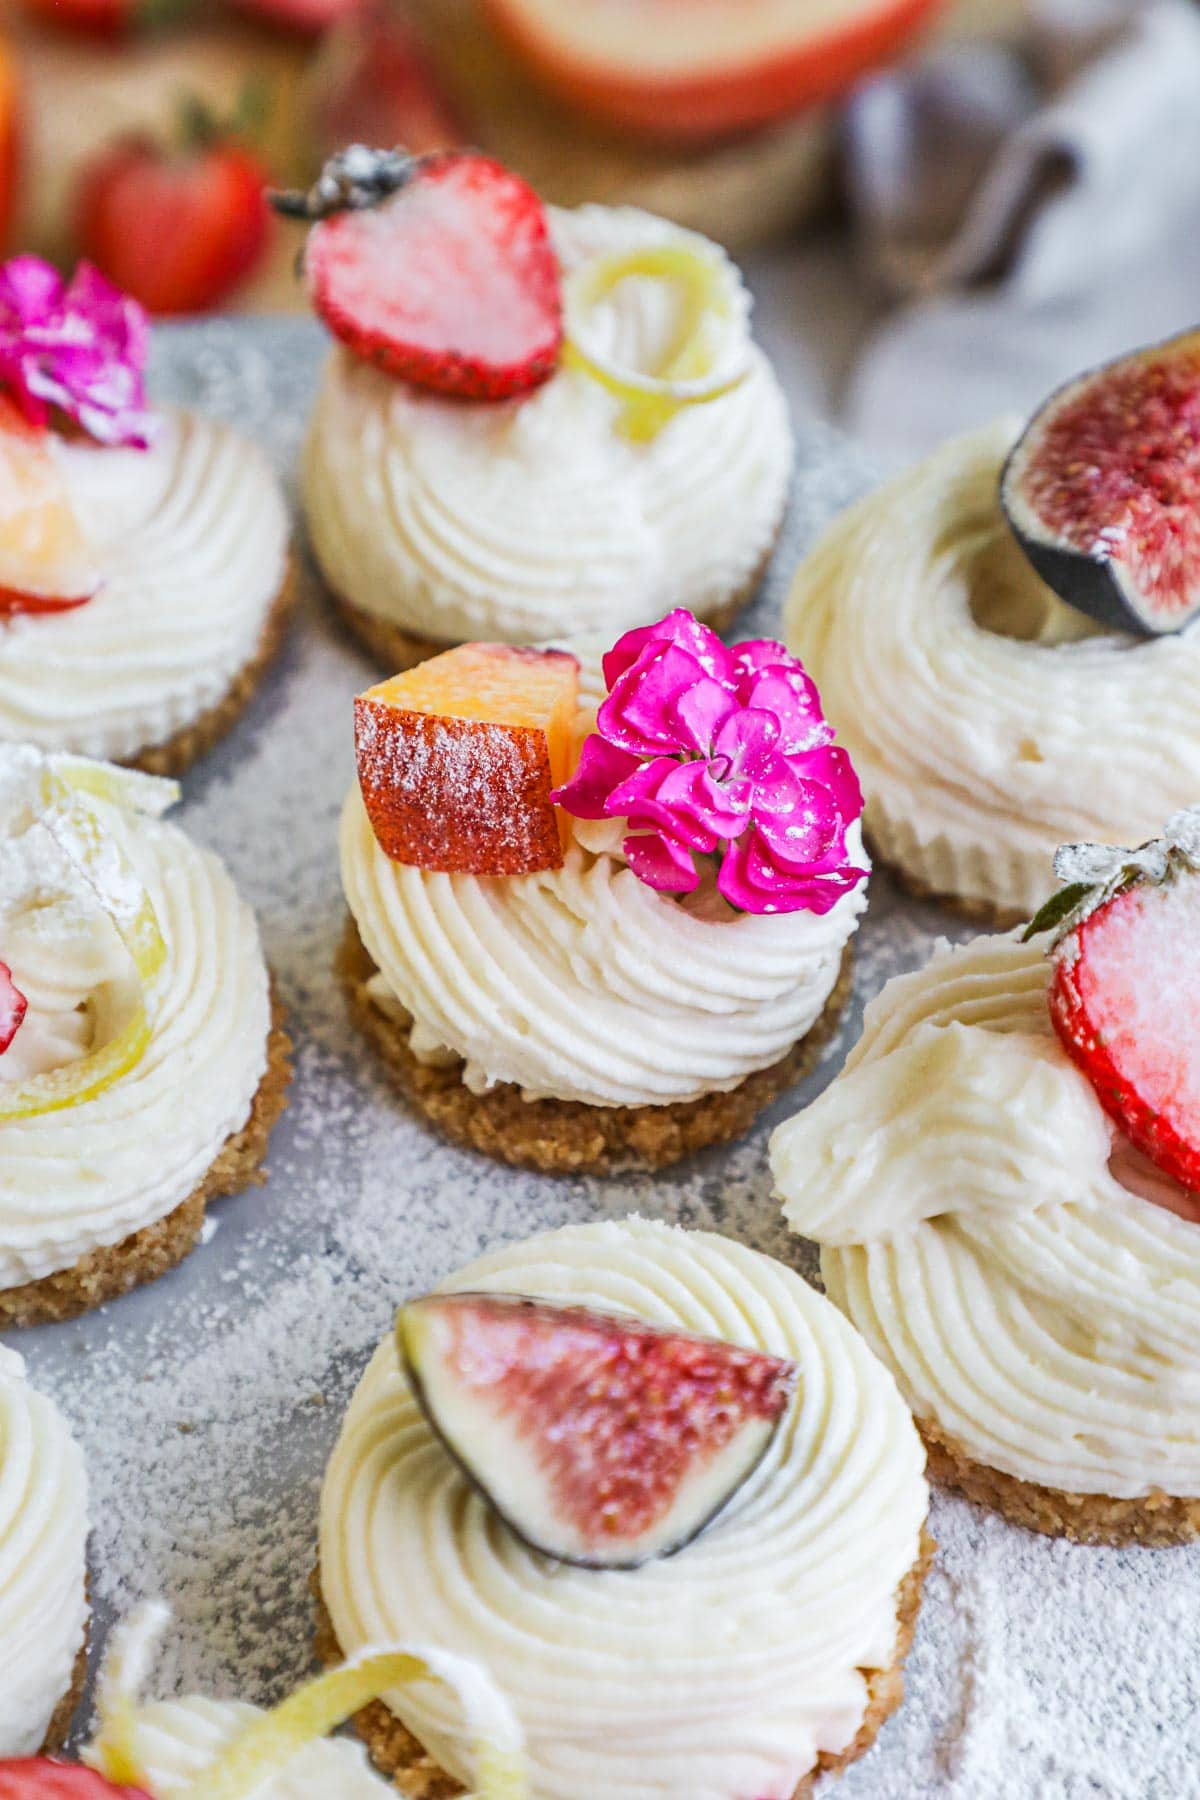
- Serve - Then, remove from the cupcake liners and arrange on a serving platter. Finally, top each cheesecake with fresh fruit, compote, chocolate shavings, or your favorite toppings and serve. (Photo 11 and 12)
Pro tip - Leave the mini cheesecakes in the refrigerator until ready to serve. Do not leave them out for more than 30 minutes or they will start to soften, especially on a warm day. If you notice that your cheesecakes have softened, just put them back in the fridge to make them firm again.
Storage
Refrigerate leftover mini cheesecakes for up to 3 days in an air-tight container or plastic wrap. You can also freeze the cheesecakes in a freezer safe container for up to 1 month.
Top Tips
- Use full-fat cream cheese for the best texture. Reduced fat versions can affect the consistency of the cheesecakes.
- Chill the cheesecakes for at least 4 hours to make sure they have sufficient time to set.
- Make the cheesecakes the day before you plan to serve them to ensure they have time to fully set.
Recipes FAQs
No-bake mini cheesecakes are popular because they are easy to make and aesthetically pleasing. They are also small and portable so they are great for parties.
No bake mini cheesecakes are set after they have chilled for a minimum of 4 hours and they are firm to the touch.
Yes, you can make these a day ahead of time for a party or get together. Just refrigerate them until you are ready to serve then add the toppings and enjoy!
Yes, you can make this recipe gluten-free if you make the crust gluten-free.
If the cheesecakes are set and cold, they should peel off easily. Don't pipe the cheesecake filling too close to the edge of the muffin liner.
Related Recipes
Did You Like This Recipe?
Love this no bake mini cheesecakes recipe? Please leave a 5-star rating in the recipe card below and leave a comment below. Thanks!
Sign up for THP's newsletter and keep in touch on Instagram, Facebook, Pinterest, TikTok, and YouTube. If you make this recipe, tag #theheirloompantry so we can see your mini cheesecakes!
📖 Recipe
No Bake Mini Cheesecakes
Equipment
Ingredients
Graham Cracker Crust
- 12 graham crackers or 1 ½ cups graham cracker crumbs
- 3 tablespoon granulated sugar
- 6 tablespoon butter or dairy-free butter melted
Filling
- 1½ cup heavy whipping cream
- 16 oz full fat cream cheese softened
- 1 cup powdered sugar
- 1 teaspoon vanilla extract or vanilla bean paste optional
- 2 teaspoon lemon zest optional
Optional Toppings
Instructions
- Prepare crust - Line a muffin tin with cupcake liners and set aside. Add graham crackers to a food processor and pulse until it forms a sandy texture. Transfer to a mixing bowl and add sugar and melted butter. Stir the mixture with a silicone spatula or a fork until the crumbs are coated and moist. Evenly distribute into cupcake liners and use your fingertips or a small glass (like a shot glass) to press the crumbs to make an even layer on the bottom of the liners. Chill while you make the filling.12 graham crackers or 1 ½ cups graham cracker crumbs, 3 tablespoon granulated sugar, 6 tablespoon butter or dairy-free butter
- Make whipped cream - Place the heavy whipping cream in the bowl and whisk by hand or use an electric mixer until the cream forms stiff peaks, about 4-5 minutes. Do not overmix or the cream will curdle. Set aside.1½ cup heavy whipping cream
- Prepare filling - In a separate mixing bowl, use a handheld mixer or stand mixer and whisk cream cheese and powdered sugar on medium until fluffy, about 3 minutes. Whisk in mix-ins of choice, if desired. Gently fold the whipped cream into the cream cheese mixture with a silicone spatula or with a mixer on the lowest setting just until incorporated and creamy. Do not over mix or the mixture will deflate.16 oz full fat cream cheese, 1 cup powdered sugar, 1 teaspoon vanilla extract or vanilla bean paste, 2 teaspoon lemon zest
- Assemble and chill - Use a silicone spatula to scrape the bottom and sides of the bowl to ensure all ingredients are incorporated. Transfer to a piping bag and pipe into each cupcake liner on top of the graham cracker crust. Alternatively, scoop and evenly distribute to each cupcake liner and use the back of a spoon to smooth out the filling. Transfer to the refrigerator and chill for at least 4 hours or overnight.
- Serve - Remove from the cupcake liners and arrange on a serving platter. Top each cheesecake with fresh fruit, compote, chocolate shavings, or your favorite toppings if desired and serve.sliced fruit or compote, whipped cream
Video
Notes
- Refrigerate leftover mini cheesecakes for up to 3 days in an air-tight container or plastic wrap. You can also freeze the cheesecakes in a freezer safe container for up to 1 month.
- Leave the mini cheesecakes in the refrigerator until ready to serve. If you leave them out of the refrigerator for more than 30 minutes, they will soften. Put them back in the fridge to make them firm again.
- Use full-fat cream cheese for the best texture. Reduced fat versions can negatively affect the consistency of the cakes.
- Chill the cheesecakes for at least 4 hours so they have sufficient time to set.
- Make the cheesecakes the day before you plan to serve them so they have time to fully set.




Leave a Reply