
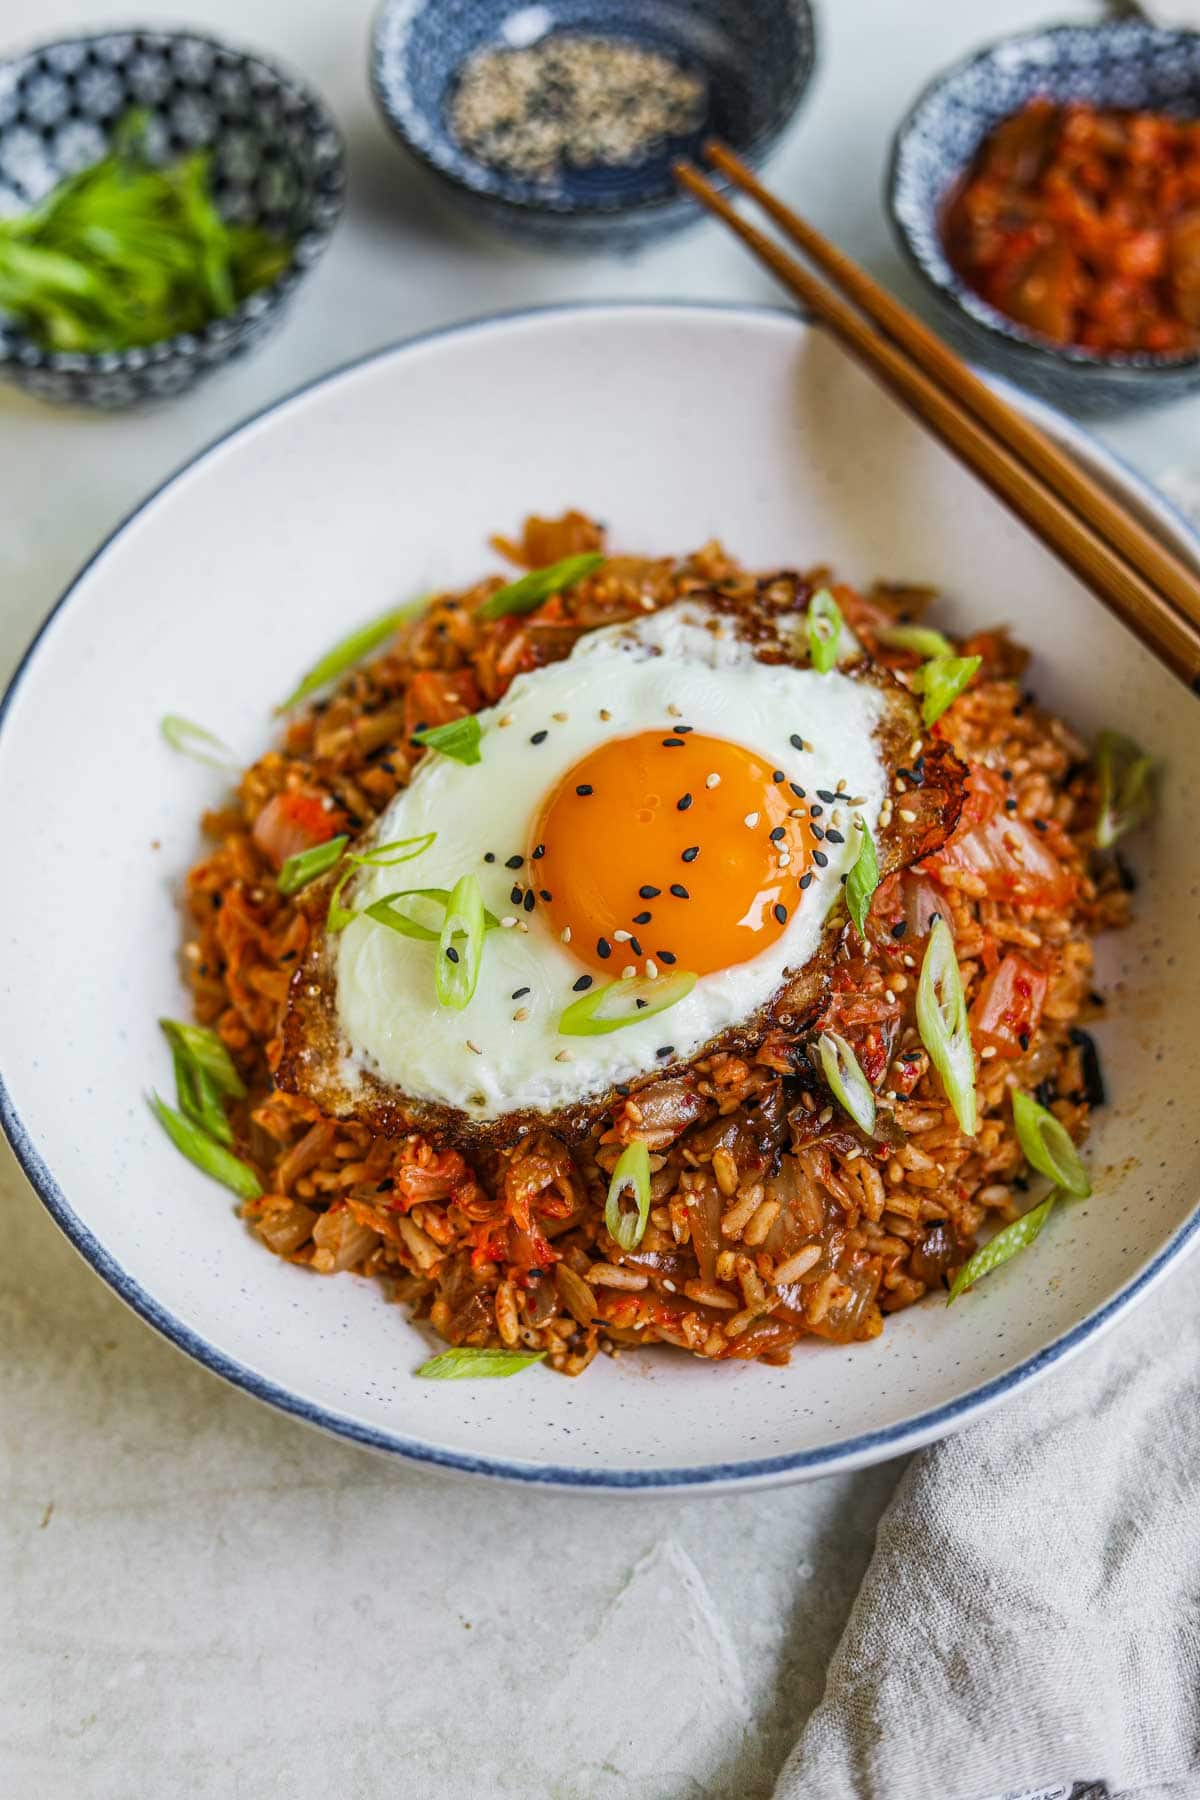
Easy Kimchi Fried Rice is a zesty, one-pot rice dish that's perfect for breakfast, lunch, and dinner. Rice is cooked with kimchi, garlic, onion, and flavorful sauces, and topped with a yolky egg. It is surprisingly simple to make, customizable, and perfect for sharing!
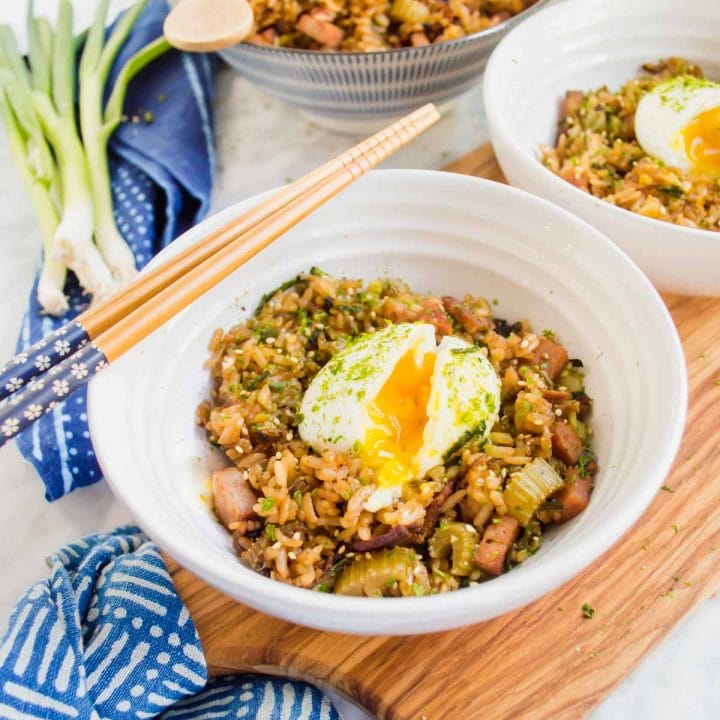
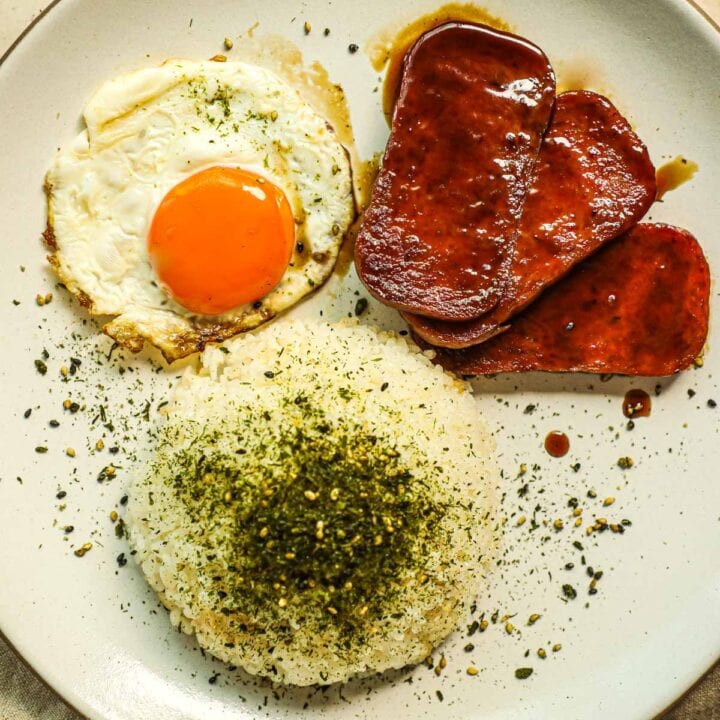
We love to make a double batch of this fried rice then enjoy it for breakfast and dinner for a couple of days. It only gets better as the flavors develop and richen. This rice is also easily customizable with extra veggies like celery or green onion and proteins like SPAM or crispy bacon.
Jump to:
About Kimchi Fried Rice
- Taste - The kimchi, rice, and egg yolk combine to create the perfect mega-bite. All of the ingredients are also doused in shoyu for extra umami flavor.
- Texture - The rice is soft and chewy while the kimchi is crunchy.
- Effort - Making fried rice is simple and requires minimal effort. All you need to do is cook the rice, cook the veggies, then cook the eggs.
- Time - Depending on how you prepare the rice, it takes about 40 minutes to make. Save time by starting the rice then chopping and cooking the veggies and eggs while the rice is cooking.
Ingredients
- Rice - We use Japanese rice because it is perfectly sticky and starchy.
- Kimchi and Kimchi Juice - Kimchi adds a pungent and pickled spice to the rice.
- Cooking oil - Use a neutral cooking oil with a high smoke point for frying like avocado, grapeseed, or canola oil.
- Yellow onion and scallions -Onions and sacallions are sweet savory and pungent.
- Garlic - Garlic adds the quintessential aromatic flavor.
- Soy sauce - Soy sauce (shoyu) adds a uniquely delicious savory element.
- Sesame oil - Sesame oil adds a nutty and toasty aroma to the dish.
- Furikake - Furikake is a Japanese seaweed seasoning that typically consists of seaweed, sesame seeds, and salt.
- Freshly Ground Black pepper - Black peppers adds a little spice.
- Butter - Butter is a rich fat to cook the eggs in.
- Eggs - We prefer to prepare the eggs so they have a runny yolk to mix in with the rice. Our favorites are sunny side up, over easy and soft boiled eggs.
See recipe card for quantities.
Substitutions
- Gluten free - Both furikake and soy sauce contain gluten. To make this rice gluten free, use gluten free furikake and replace traditional soy sauce with tamari.
- Brown rice - Use brown rice to make rice healthier or if you just prefer the taste and texture to Japanese white rice. We recommend Koda Farm's Whole Grain Brown Kokuho Rose, which is a Japanese brown rice with a nutty flavor.
Variations
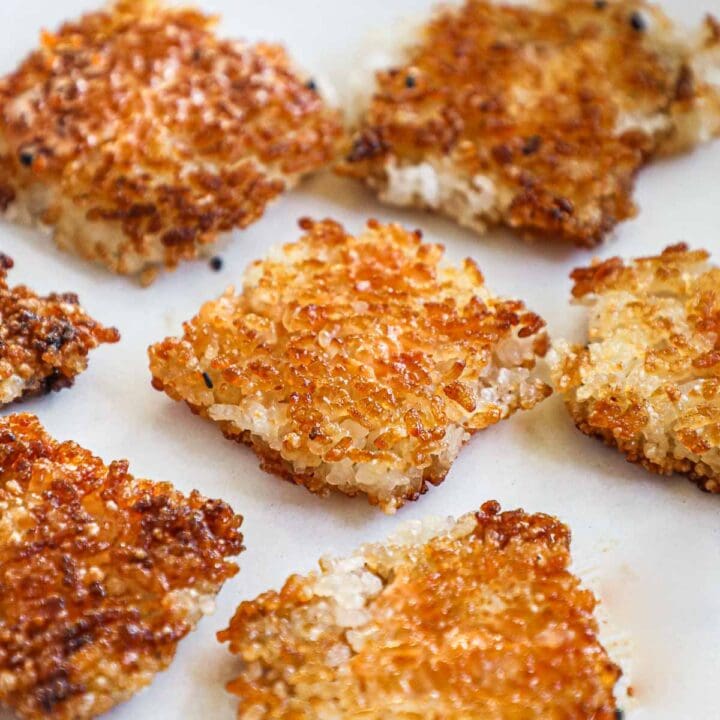
- Protein - Mix in SPAM, bacon, steak, pork belly, chicken, soyrizo, or scrambled eggs for extra protein and flavor.
- Extra Spicy - Kimchi is a little spicy, but you can make this recipe extra spicy by adding Sriracha or hot sauce to the rice.
- No Kimchi - Omit the kimchi for a more traditional and less spicy fried rice.
- Celery - Celery provides extra crunch.
- Green Onion - Add thin sliced green onions for a bright garnish.
- Peas - Add one cup frozen peas for a sweet and springy flavor.
Instructions
Rice
- Stovetop instructions - Place rice in a saucepan and rinse the rice in the sink until the water runs clear, then drain. Combine washed rice and filtered water in a medium saucepan. Bring the rice to a low boil, then reduce the heat to low. Cover the pot and simmer for 20 minutes or until the water is absorbed. Then remove from the heat and let sit covered for 10 minutes. Fluff the rice with a fork.
- Rice cooker instructions - Place rice in the electric rice cooker pot and rinse the rice in the sink until the water runs clear, then drain. Combine rice and filtered water in the pot and cook per the rice cooker directions.
- Optional - Once the rice is finished cooking, transfer to a sheet pan and let it dry out while you start the next steps.
Kimchi Fried Rice
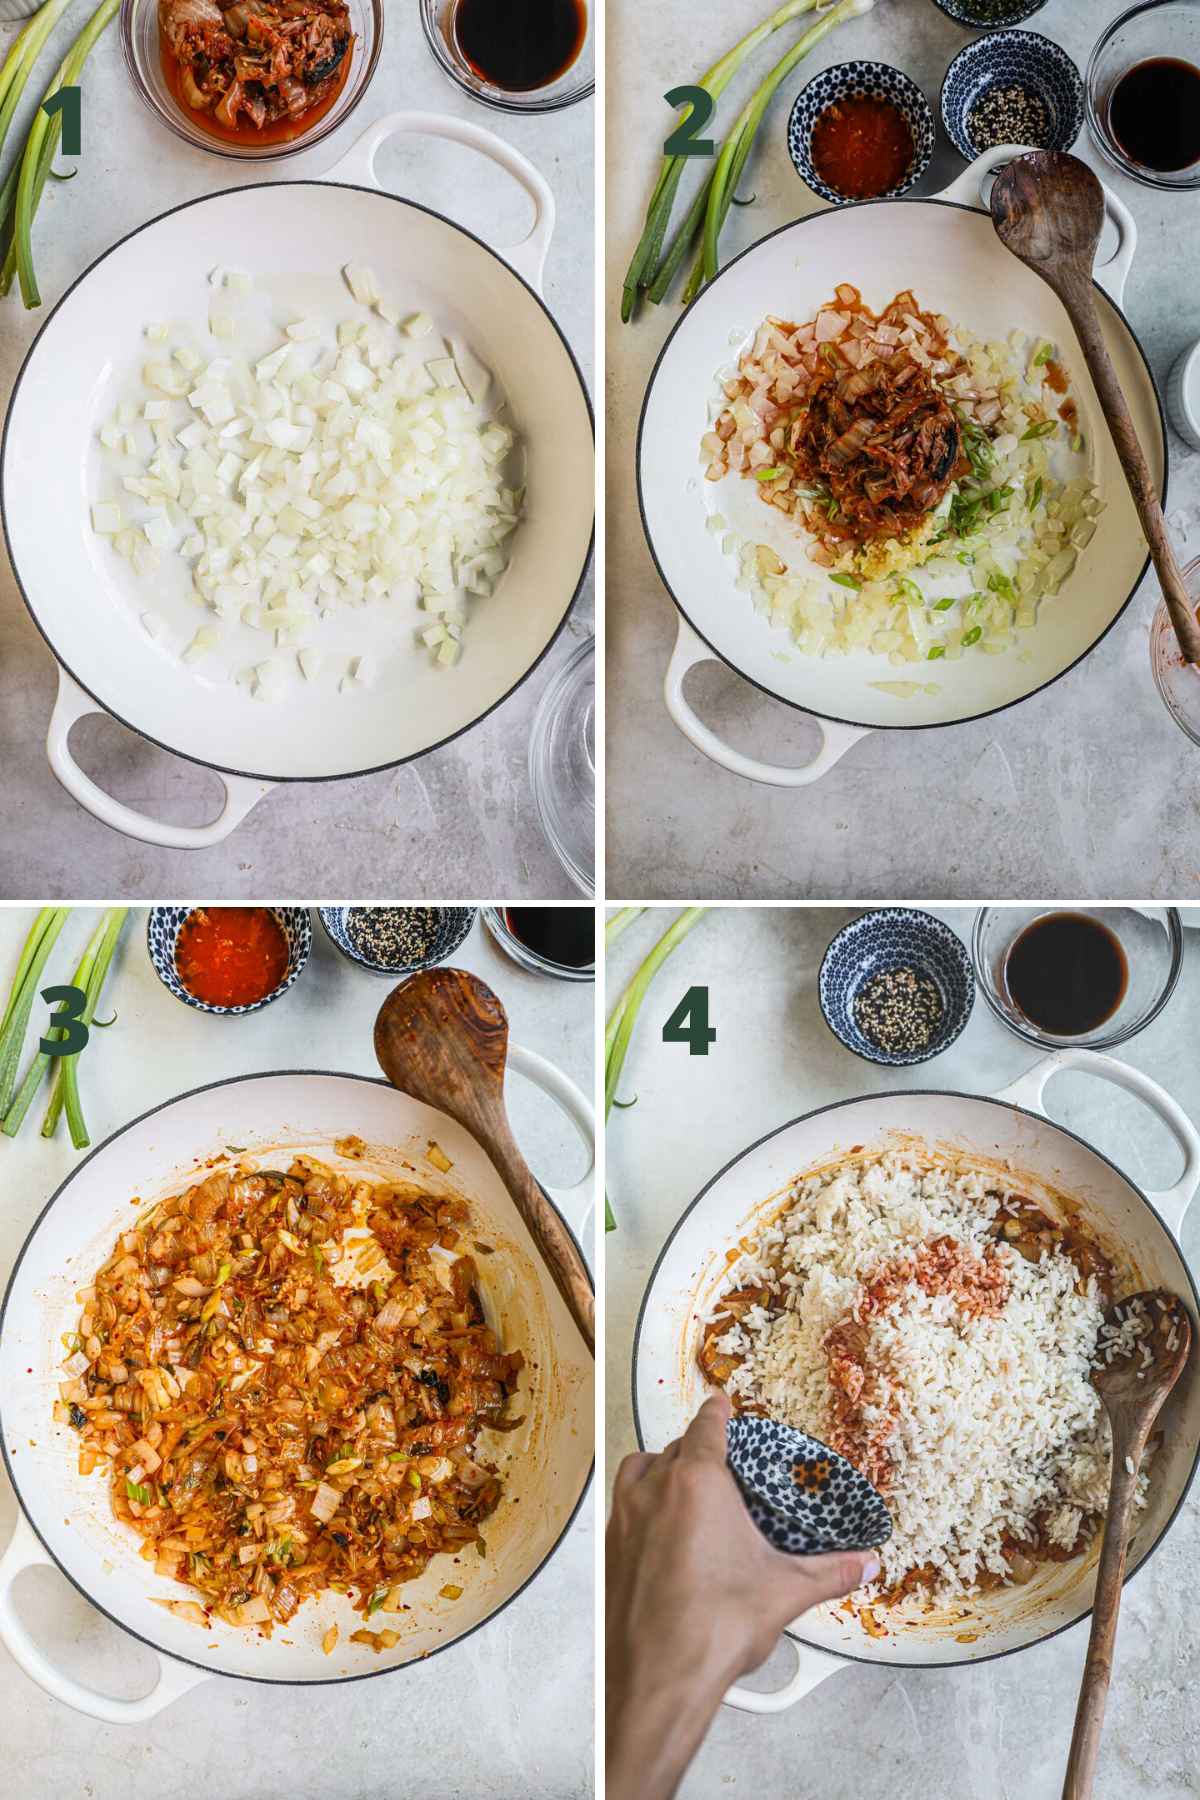
- Cook vegetables - While the rice cooks, prepare the vegetables. In a large skillet, add cooking oil and warm on medium-low heat. Add onion and cook until translucent. Add minced garlic, scallions, and chopped kimchi. Then stir to incorporate the ingredients and cook for 3 minutes, or until some of the kimchi juice cooks off. (Photo 1, 2, and 3)
- Add rice - Add in the cooked rice one cup at a time and the reserved kimchi juice, folding the ingredients into the rice. Then turn the heat to medium and cook until the rice absorbs the juice, stirring occasionally. (Photo 4)
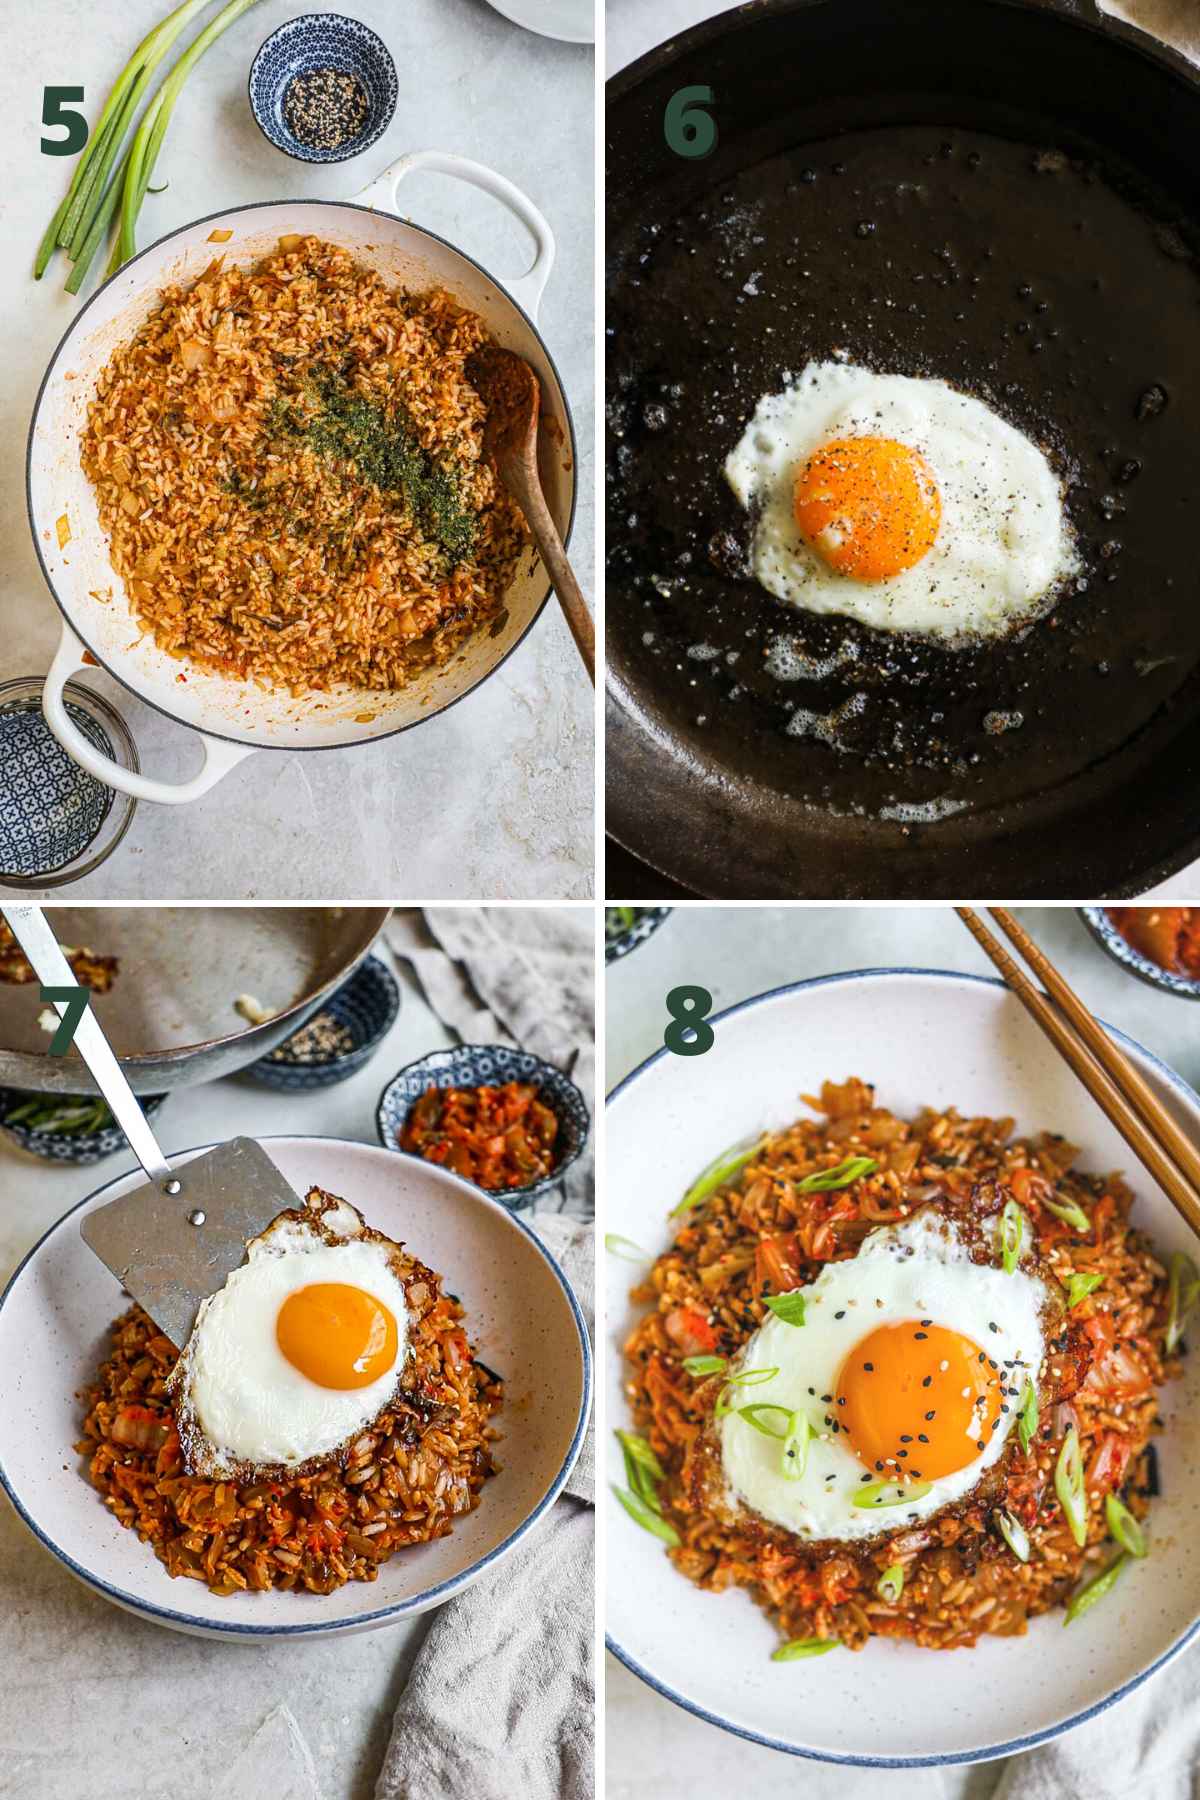
- Add other mix-ins - Pour the soy sauce over the rice and fold the ingredients until all of the rice is evenly coated with soy sauce. Add a drizzle of sesame oil and stir. Stir in black pepper and furikake. Use a wooden spoon to scrape some of the fond (the browned bits stuck to the bottom of the pan) and mix it into the rice. Then turn the heat down to low and allow it to cook. (Photo 5)
- Cook eggs - While the rice cooks, heat butter in a skillet over low-medium heat. Once the butter is melted and slightly foamy, crack the egg onto the skillet. Cook for about 2 to 2½ minutes. The eggs are ready when the egg whites go from clear to white and the edges start to crisp. (Photo 6)
- Assemble - Quickly plate the rice and top with the fried eggs. Add scallions and sesame seeds. Enjoy! (Photo 7 and 8)
Pro tip - Don't use too much water when you initially cook your rice. You want the rice a little drier to soak up all the fried rice juices.
What to Serve With Kimchi Fried Rice
This kimchi fried rice is great on its own, but we also love to add proteins like fried spam, bacon, or flank steak for an extra hearty meal. You can also swap out the sunny side up eggs for soft boiled jammy eggs or over medium eggs for a slightly different texture. Finally, we love to pair this hearty breakfast with a refreshing drink like a matcha latte, matcha lemonade, or iced coffee.
Storage
Store leftover fried rice in an air-tight container in the refrigerator for up to 3 days. You can reheat leftover rice in a pan on the stove over low heat or in a microwave in a microwave safe container until hot.
Top Tips
- If possible, cook and refrigerate your rice the day before you want to use it. This helps the rice to be slightly dried out and the perfect texture for frying.
- If you are using a rice cooker and the outside of the rice gets hard or crispy, use a fork to fluff the rice and add moisture back into those crispy parts.
- Make sure your store-bought kimchi aligns with your spice tolerance. If you don't like a lot of heat, opt for a mild kimchi.
- If you buy kimchi that comes in bigger chunks, chop it up into bite size pieces.
- If you add animal protein, cook the meat first, remove it from the pan, then follow the rest of the recipe steps.
Recipes FAQs
Kimchi is traditionally made from fermented vegetables including napa cabbage, daikon radish, and cucumber. It is often seasoned with Korean chili flakes (gochugaru), fish sauce, garlic and ginger.
Kimchi has a unique and spicy umami flavor. The spice level depends on the type of kimchi you eat and how you prepare it.
Yes, since kimchi is fermented, it contains probiotics. Probiotics can help maintain healthy digestion, improve heart health, and support your immune system.
Short-grain rice is best because it has a nice chewy texture and a high starch content, which prevents the rice from sticking together when fried.
Our kimchi fried rice recipe has some kick from the kimchi but overall isn't too spicy. If you want to make it more or less spicy, you can use spicier or less spicy kimchi.

Related Recipes

Did You Like This Recipe?
Love this easy kimchi fried rice recipe? Please leave a 5-star rating in the recipe card below and leave a comment below. Thanks!
Sign up for THP's newsletter and keep in touch on Instagram, Facebook, Pinterest, TikTok, and YouTube. If you make this recipe, tag #theheirloompantry so we can see your homemade kimchi fried rice!
📖 Recipe

Easy Kimchi Fried Rice
Equipment
Ingredients
- 1½ cups Japanese short grain rice
- 2 cups filtered water
- Or 4 cups cooked Japanese short grain rice
- 1 tablespoon cooking oil (avocado, etc.)
- 1 yellow onion chopped
- 4 cloves garlic minced
- 2 scallions chopped
- 1½ cups kimchi
- 4 tablespoon kimchi juice
- 2 tablespoon soy sauce
- 2 teaspoon sesame oil
- 2 teaspoon furikake
- 1 teaspoon freshly cracked black pepper
Toppings
- scallion
- sesame seeds
Instructions
Rice
- Stovetop instructions - Place rice in a saucepan and rinse the rice in the sink until the water runs clear, then drain. Combine washed rice and filtered water in a medium saucepan. Bring the rice to a low boil, then reduce the heat to low. Cover the pot and simmer for 20 minutes or until the water is absorbed. Remove from the heat and let sit covered for 10 minutes. Fluff the rice with a fork.1½ cups Japanese short grain rice, 2 cups filtered water, Or 4 cups cooked Japanese short grain rice
- Rice cooker instructions - Place rice in the electric rice cooker pot and rinse the rice in the sink until the water runs clear, then drain. Combine rice and filtered water in the pot and cook per the rice cooker directions.
- Optional - Once the rice is finished cooking, transfer to a sheet pan and let it dry out while you start the next steps.
Kimchi Fried Rice
- Cook vegetables - While the rice cooks, prepare the vegetables. In a large skillet, add cooking oil and warm on medium-low heat. Add onion and cook until translucent. Add minced garlic, scallions, and chopped kimchi. Stir to incorporate the ingredients and cook for 3 minutes, or until some of the kimchi juice cooks off.1 tablespoon cooking oil (avocado, etc.), 1 yellow onion, 4 cloves garlic, 2 scallions, 1½ cups kimchi
- Add rice - Add in the cooked rice one cup at a time and the reserved kimchi juice, folding the ingredients into the rice. Turn the heat to medium and cook until the rice absorbs the juice, stirring occasionally. Pour the soy sauce over the rice and fold the ingredients until all of the rice is evenly coated with soy sauce. Add a drizzle of sesame oil and stir. Stir in black pepper and furikake. Use a wooden spoon to scrape some of the fond (the browned bits stuck to the bottom of the pan) and mix it into the rice. Turn the heat down to low and allow it to cook.2 tablespoon soy sauce, 2 teaspoon sesame oil, 2 teaspoon furikake, 1 teaspoon freshly cracked black pepper, 4 tablespoon kimchi juice
- Cook eggs - While the rice cooks, heat butter in a skillet over low-medium heat. Once the butter is melted and slightly foamy, crack the egg onto skillet. Cook for about 2 to 2½ minutes. The eggs are ready when the egg whites go from clear to white and the edges start to crisp.2 teaspoon butter, 4 eggs
- Assemble - Quickly plate the rice and top with the fried eggs. Add scallions and sesame seeds. Enjoy!scallion, sesame seeds
Notes
- Refrigerate leftover fried rice in an air-tight container for up to 3 days. Reheat leftover rice in a pan on the stove over low heat or in a microwave in a microwave safe container until hot.
- Don't use too much water when you initially cook your rice. You want the rice a little drier to soak up all the fried rice juices.
- If you are using a rice cooker and the outside of the rice gets hard or crispy, use a fork to fluff the rice and add moisture back into those crispy bits.
- Make sure your store-bought kimchi aligns with your spice tolerance and how spicy you want your fried rice.
- If your store-bought kimchi comes in bigger chunks, chop it up into bite size pieces.
- If you add animal protein, cook the meat first, remove it from the pan, then follow the rest of the recipe steps.


Leave a Reply